Jun 25, 2020
In Swedish handweaving tradition,
hand-knotted carpets run a whole spectrum.
They can be somewhat loose with long loops,
very tight with short cut pile,
or anything in between.
The looser end of the scale is called rya,
the tighter end is called flossa.
They use the same technique and the same knot,
but produce very different results.
We'll focus on flossa today,
which is the one I'd wanted to test for years.
It proved a bit tricky even when cross-referencing several sources:
this posts records the extra things I had to figure out or ask people about.
As a result, it runs long and contains a ton of schematics.
Settle in!
The numbers
Like a good overarchiever fond of fine yarns,
I obviously went with something tighter than the traditional Swedish flossa.
The typical quality is 15 knots per 10cm in both directions, so I went with 20.
My sample warp was as follows:
- 8/3 unbleached linen from Holma;
- 4 ends per centimeter (one end per dent in a 40/10 reed);
- about 3m long, so I could weave a decent amount with both the front and back apron rod out of the way;
- 20cm wide pattern area, 88 threads total: 40x2 for the pattern, 3 for each border, and an extra one to double up the last border warp end.
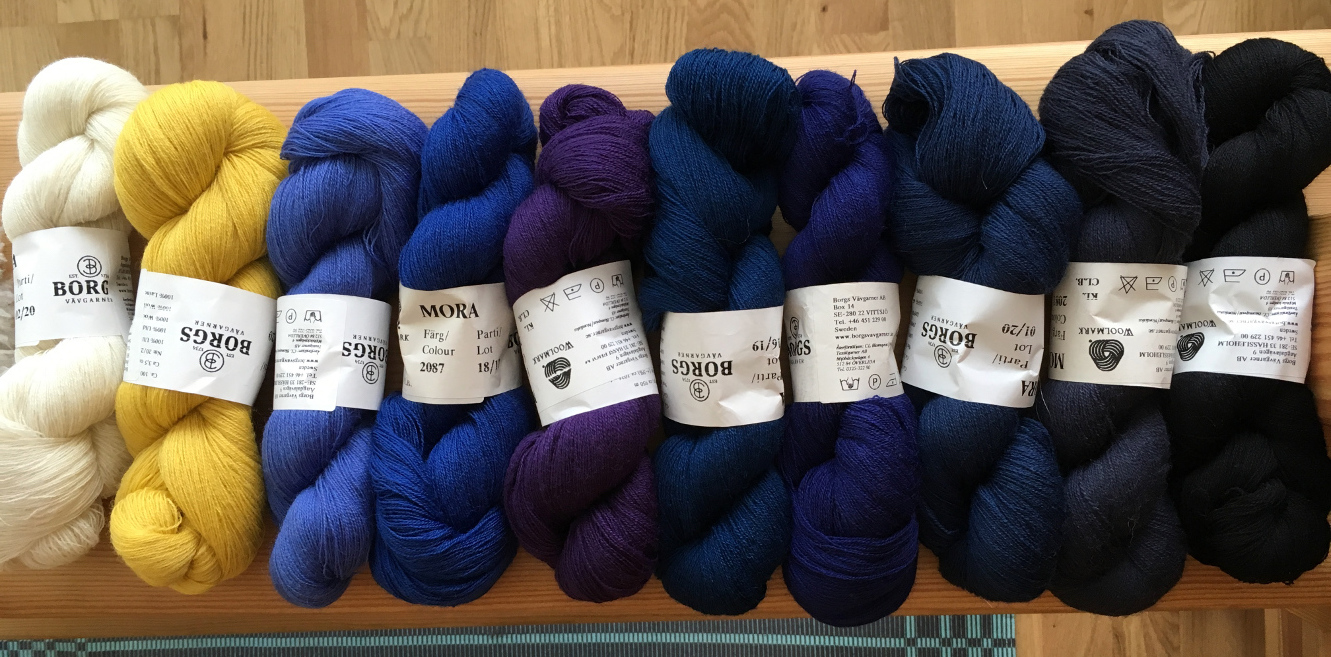
For the weft, I wanted to use some of that dark blue-purple palette I picked up impulsively.
All of that is a wool yarn called Mora, which is very thin and soft.
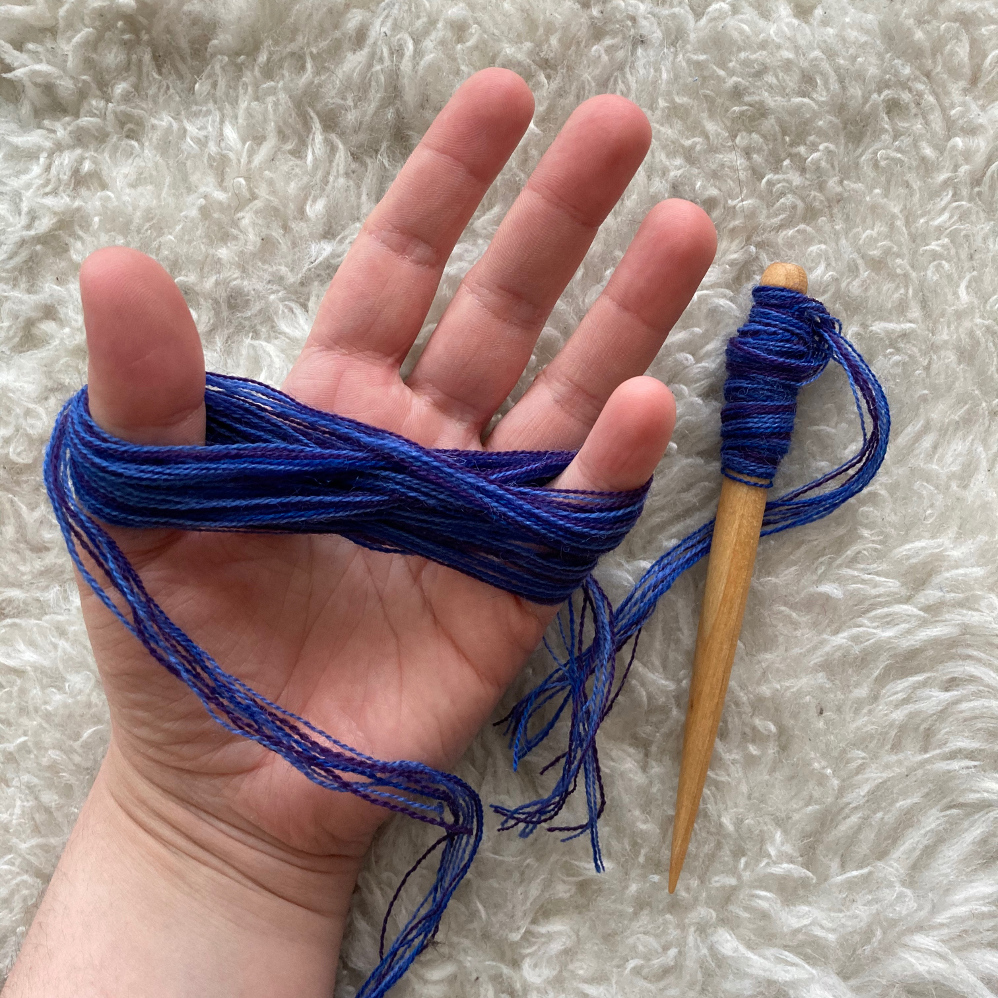
Because it's so thin, I had to group several strands into larger bundles,
which would let me play with color a lot more.
After much testing, I ended up with:
- 5 strands per bundle for both the ground and selvedges wefts (for consistency and a more homogeneous back);
- 10 strands per bundle for the knotted pile, resulting in 20 ends per knot.
Finally, to get perfectly square "pixels",
I needed to figure out exactly how many picks of ground needed to be woven betwen knot rows.
That ended up being:
- 6 rows of ground between knots;
- 4 rows of selvedge to create the "holder" for the knots.
Basics
The ground weave holds the knots in place,
and gives structure to the piece.
It's woven with classic tapestry technique:
plain weave, high warp tension, and a weft that covers the warp fully.
This means the weft has to do all the work,
traveling more around the warp ends,
and needs extra slack to make up for it.
If it doesn't have that extra slack, the warp will draw in.
On a loom without a beater, that will make the edges of the piece curve in,
resulting in a typical hourglass shape.
On a loom with a beater,
as I was using here,
that will cause the warp to get damaged by the friction of the reed.
Because I was weaving dark colors on a light warp,
the damage showed as broken linen fibers poking out through the wool!
Finding the right amount of bubbles to make and how big they should be takes a bit of trial and error:
always leave room at the start of your warp for sampling.
I used a tapestry bobbin to make the bubbles,
since my sett was high and doing it with my fingers was tricky.
Next is the pile.
The most common knot is known as rya or Ghiordes knot.
It's made over two warp threads,
with the ends of the pile bundle coming up between those two threads.
There are other knots one can use to get special effects or a higher density:
see the references at the end of the page.
I used tapestry bobbins again, because my yarn butterflies always come undone.
I also find bobbins much easier to wrangle,
but that's a personal preference!
To get an even pile length a bit more easily,
the knots can be made around a "flossa ruler",
which consists of two long, thin metal plates held together.
The height of the ruler will be the height of the pile,
whether it's left as loops or cut.
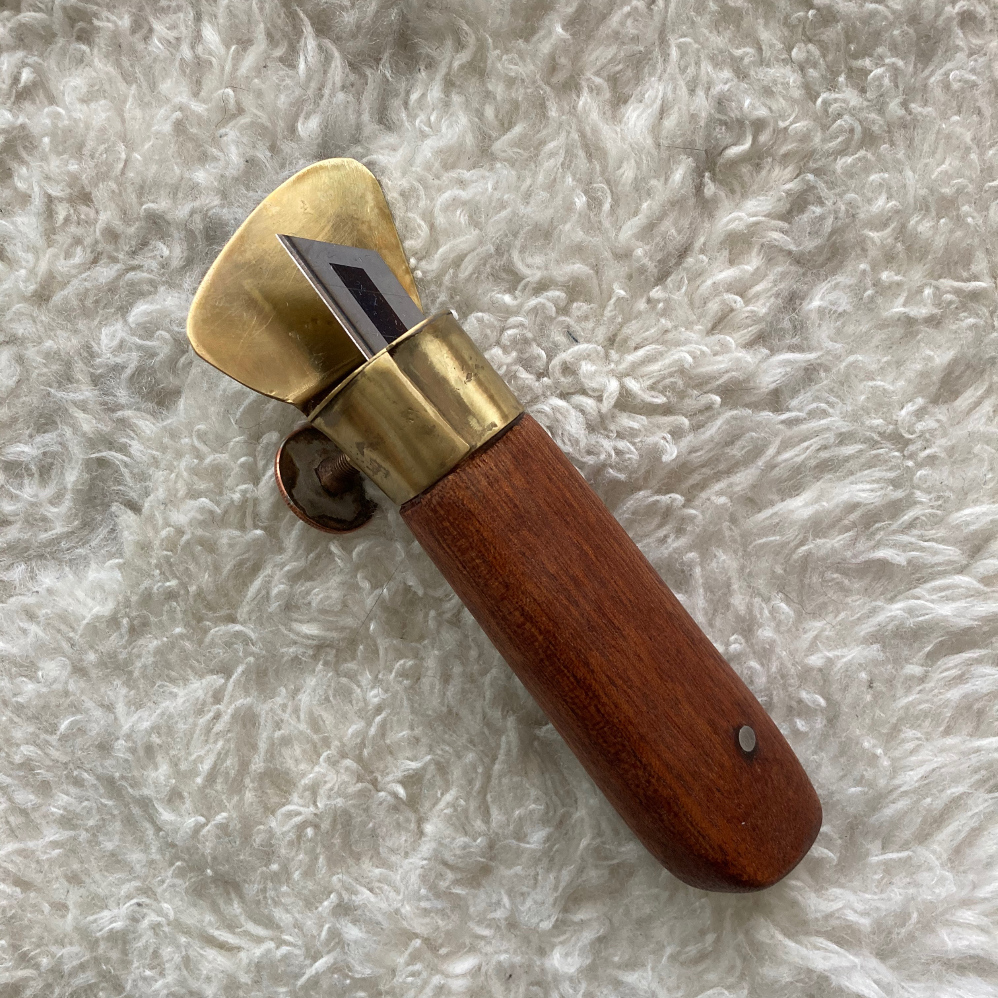
A blade can then be ran between the plates to cut the pile,
and there is a special flossa knife with a protection plate to avoid cutting too deep.
But none of those tools are necessary:
you can make loops around your fingers for consistency, and cut them open with scissors.
Complications
Things got complicated due to the selvedges.
The pile will not go all the way to the edges of the piece,
meaning they need to be built up separately to keep things lined up.
There are a lot of different ways to tackle them:
I kept it simple, and wove the three edge threads in plain weave.
In Swedish, that's called a "platt kantsnärjning", flat selvedge.
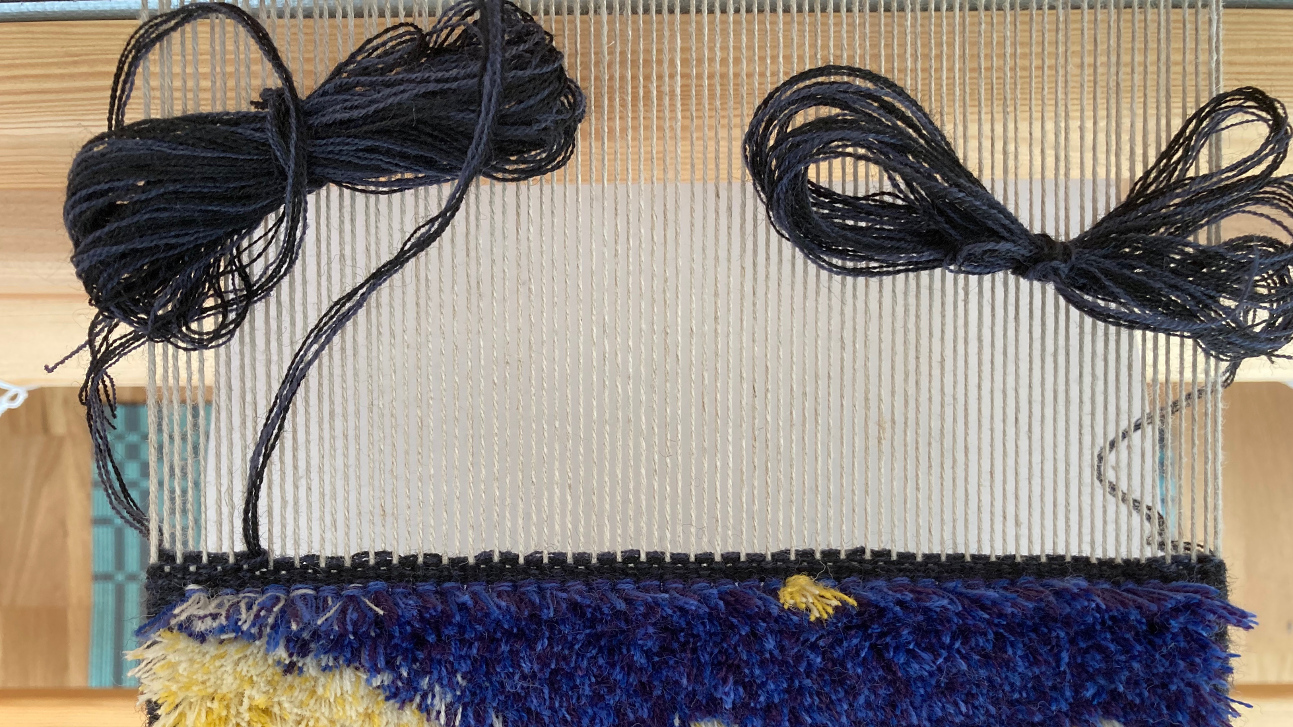
As suggested by Att Väva - see references - I gave each side its own yarn bundle.
But those selvedges aren't the whole picture:
there is also a ground weft, generally much cheaper yarn,
that is woven between the rows of knots to keep them in place.
How this ground weft interacts with the selvedges can vary a lot,
but it needs to interlock or overlap in some way to avoid creating gaps.
Again Att Väva gave pointers, but a few things remained unclear.
And no book I could find explained them quite enough!
Luckily, Arianna, one of the authors of Att Väva, answered my (numerous) questions,
and I was able to put something together.
Solutions
The first thing I figured out when testing is that "meet and separate" very much applies.
That's a ground principle of tapestry weaving,
which dictates that wefts are always started and ended together or at the edges,
and have to "meet" each other when they change direction on the same pick.
How does that affect the selvedge wefts?
Because they both have to meet the ground neatly,
they need to be offset to obey meet and separate.
Att Väva actually contains a hint to this
when it says both selvedges bundles need to hang under the last warp thread:
because the warp end count is an even number,
that's only possible if they are offset.
That means that they both weave towards the left, or towards the right,
but never "inwards" or "outwards" at the same time.
Note how the left selvedge weft weaves five times instead of four at the start,
and ends up one pick ahead of the right selvedge weft.
Next, we need to interlock the selvedges and the ground.
Att Väva suggests pushing the selvedge bundle further in,
interlocking the wefts as you would in rölakan,
and alternating how far in it goes - 1, 2, 3 knots' worth -
so the extra bulk is distributed over the width.
That left the last piece of the puzzle:
how does the ground weft go between knot rows?
Because due to the interlocking, it's not on the edge anymore,
and has to go between the knots as they're being made.
Arianna thankfully had an answer to that question:
just pull a loop of the ground weft between the warp ends,
and put the shuttle / bundle out of the way on the beater or right beyond it.
That way, the ground weft does not interfere with the knotting,
and is still in the right place once it needs to be used again.
Putting it all together
My sample had 6 picks of ground to hit exactly 5mm per knot row.
This means the whole 1 - 2 - 3 sequence happened once per ground sequence,
and got flipped in the next section.
The weaving therefore had the following steps, starting right after a knot row is complete. The number of knots under which to interlock alternated every other repeat.
- Beat the knots in place;
- Pull the ground weft loop back up, 1 (3 on the alternate repeat) knots in;
- Row 1:
- Ground towards the right;
- Right selvedge towards the left;
- Stop 3 (1) knots in.
- Row 2:
- Interlock and weave right selvege towards the right;
- Weave left selvedge towards the right;
- Stop 1 (3) knots in;
- Weave ground towards the left;
- Stop 1 (3) knots in.
- Row 3:
- Interlock and weave left selvege towards the left;
- Weave right selvedge towards the left;
- Stop 2 (2) knots in;
- Weave ground towards the right;
- Stop 2 (2) knots in.
- Row 4:
- Interlock and weave right selvege towards the right;
- Weave left selvedge towards the right;
- Stop 2 (2) knots in;
- Weave ground towards the left;
- Stop 2 (2) knots in.
- Row 5:
- Interlock and weave left selvege towards the left;
- Weave right selvedge towards the left;
- Stop 1 (3) knots in;
- Weave ground towards the right;
- Stop 1 (3) knots in.
- Row 6:
- Interlock and weave right selvege towards the right;
- Weave left selvedge towards the right;
- Stop 3 (1) knots in;
- Weave ground towards the left;
- Stop 3 (1) knots in.
- Row 7:
- Interlock and weave left selvege towards the left;
- This corrects for the offset between selvedge bundles.
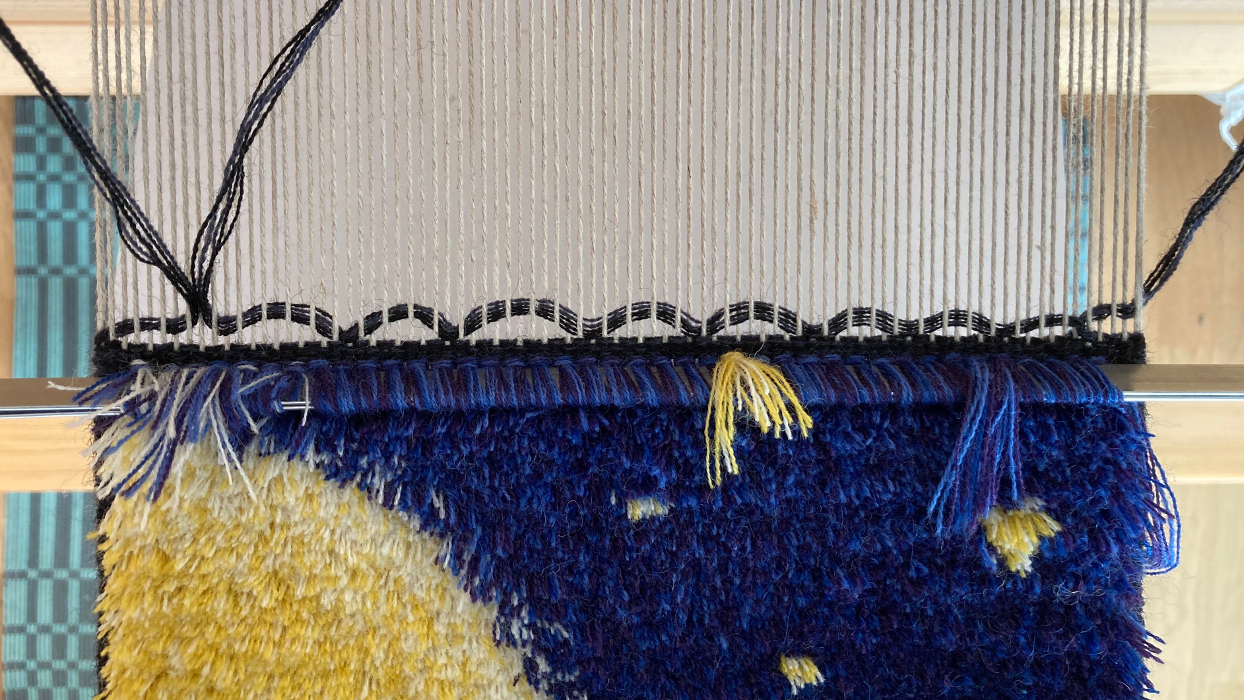
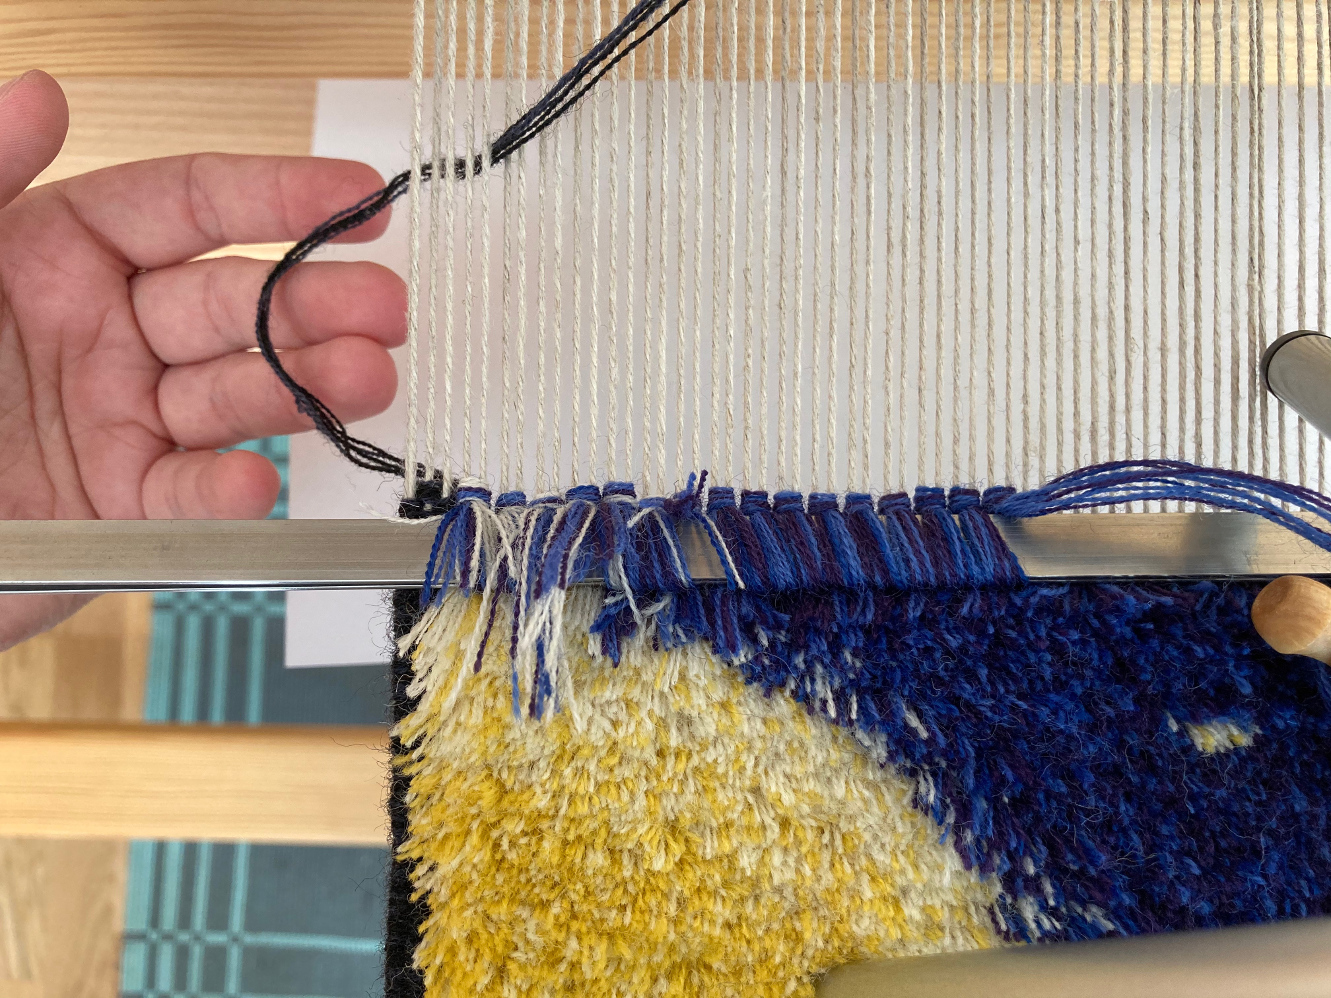
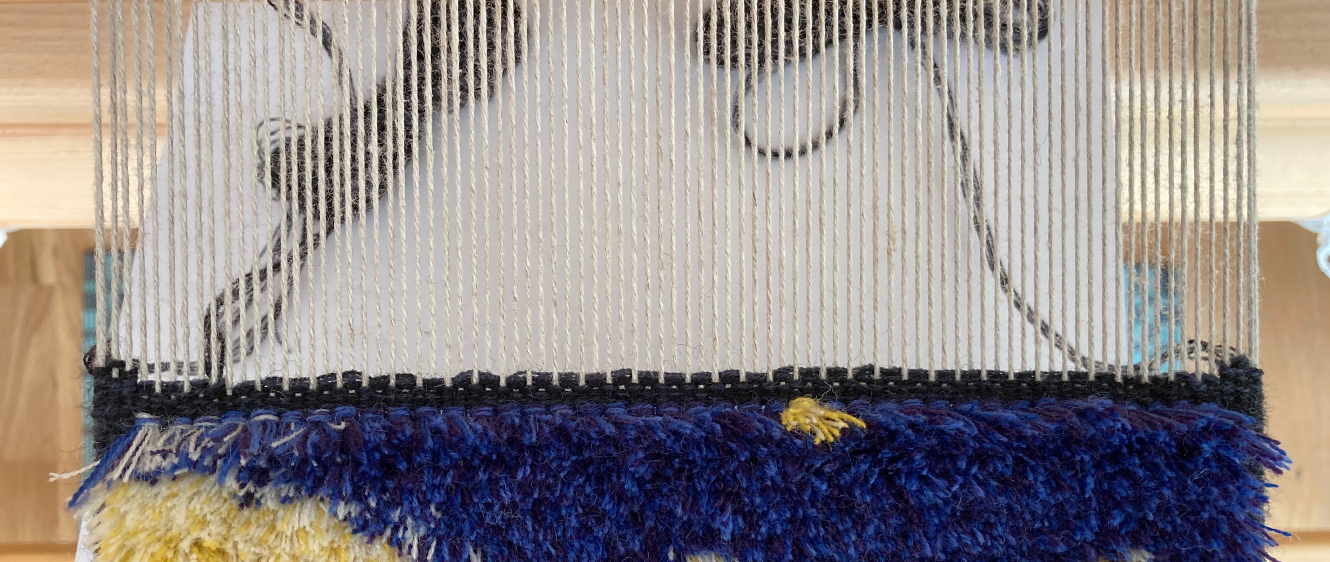
The picture below shows the state of the piece at the end of the ground rows.
Click to go to a full video of the weaving process of a single row (about 12MB, mild camera motion warning).
- Cut the knots, and remove the ruler;
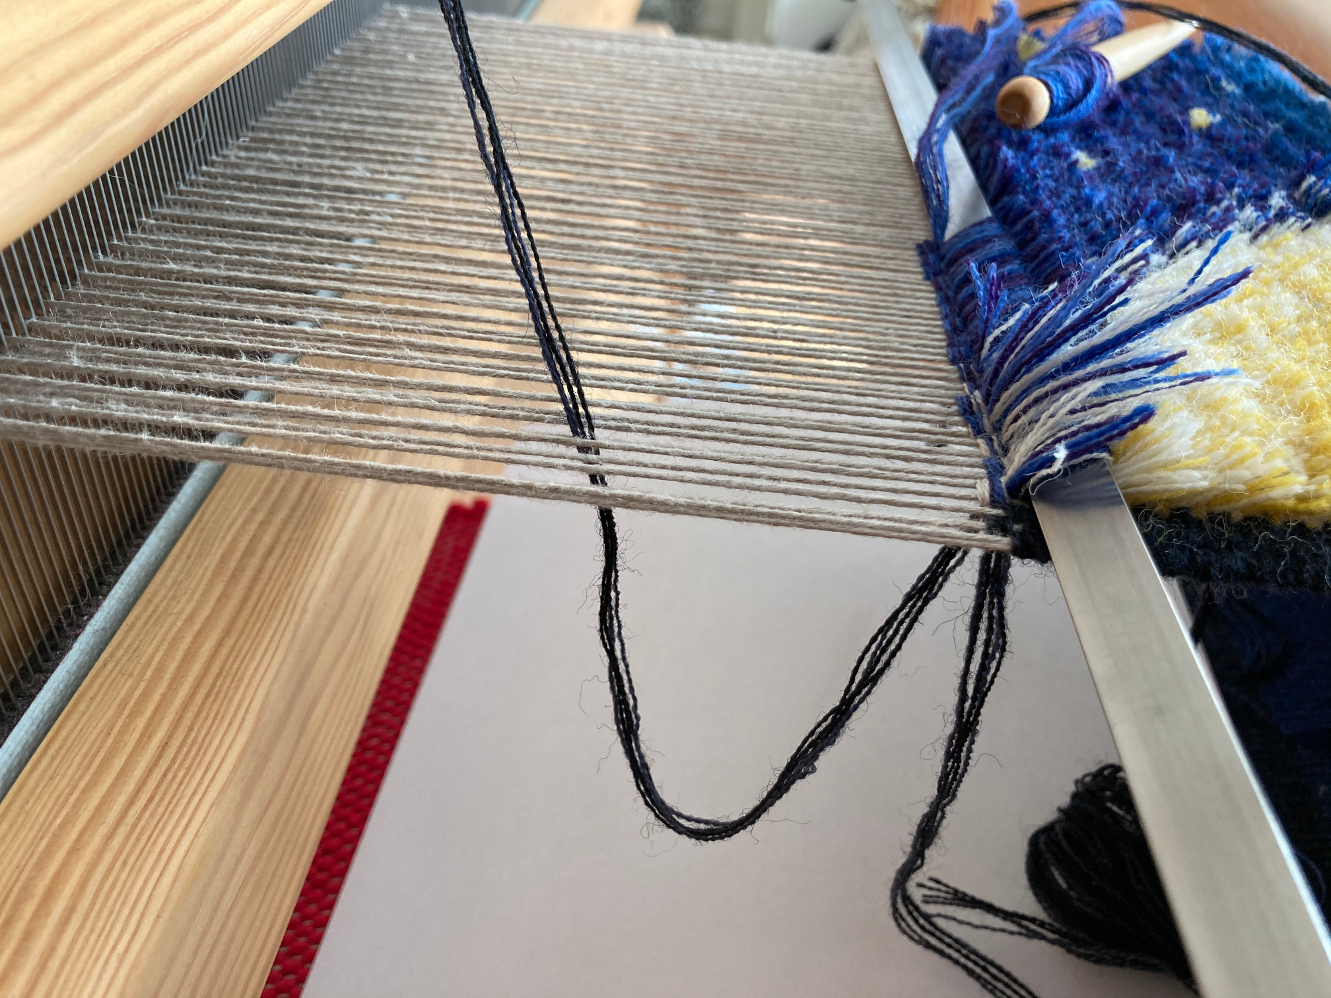
- Knot row selvedges:
- Weave four picks with each selvedge bundle;
- End on the outer edge, under the last warp end, on each side;
- This requires the offset between selvedge bundles to be correct.
- Pull the ground weft loop back down, 3 (1) knots in;
- Make the knots around the ruler, changing colors as necessary.
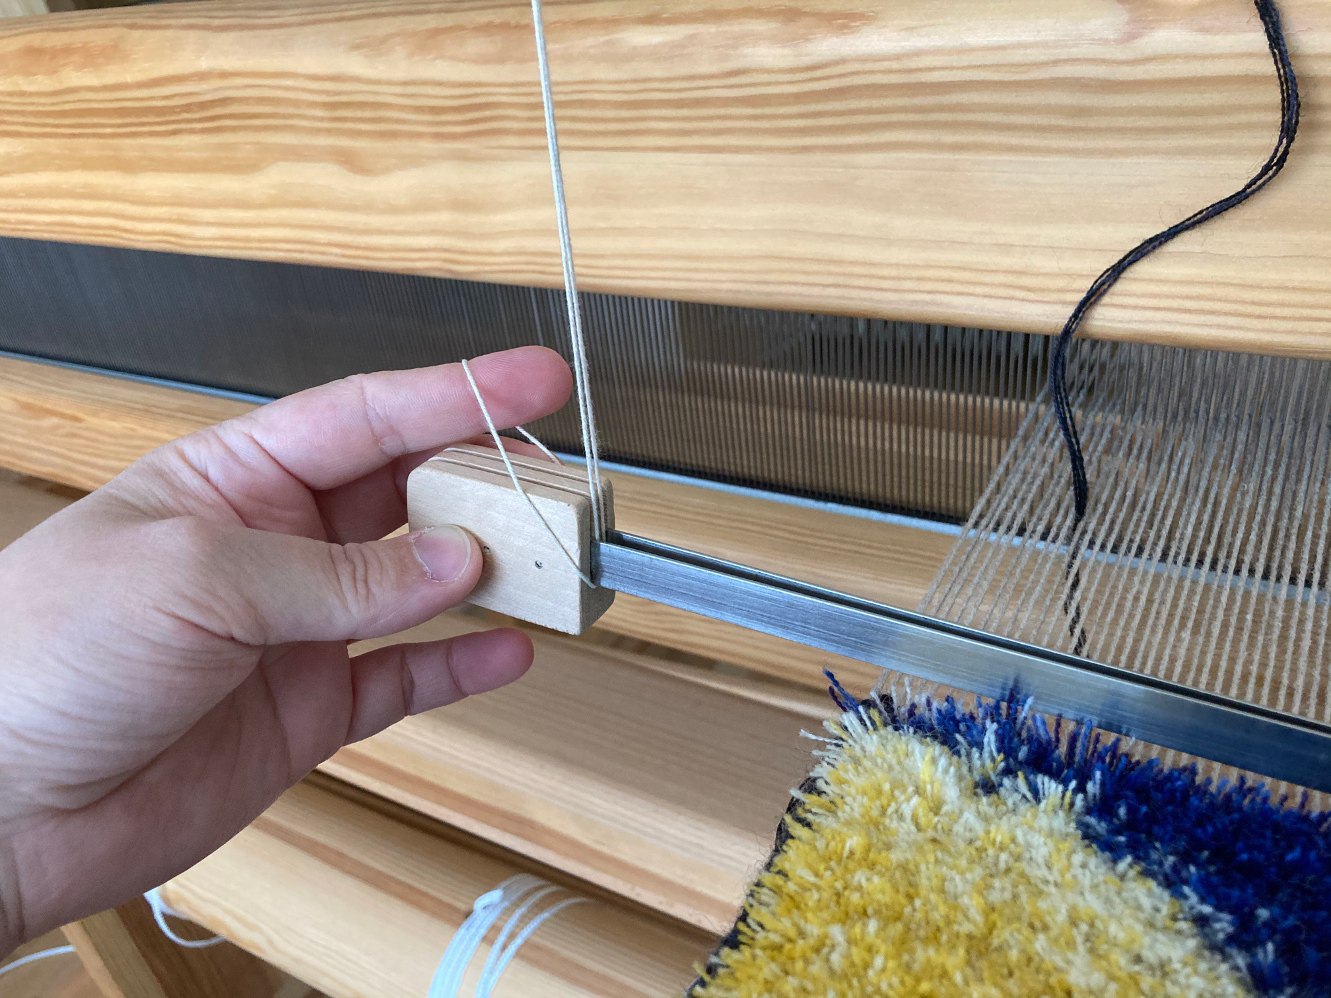
For easier knotting, the ruler can be hanged from the top of the beater
with a long loop of yarn passed between the plates.
Details of this trick and how to knot efficiently can be found in Att Väva.
Result
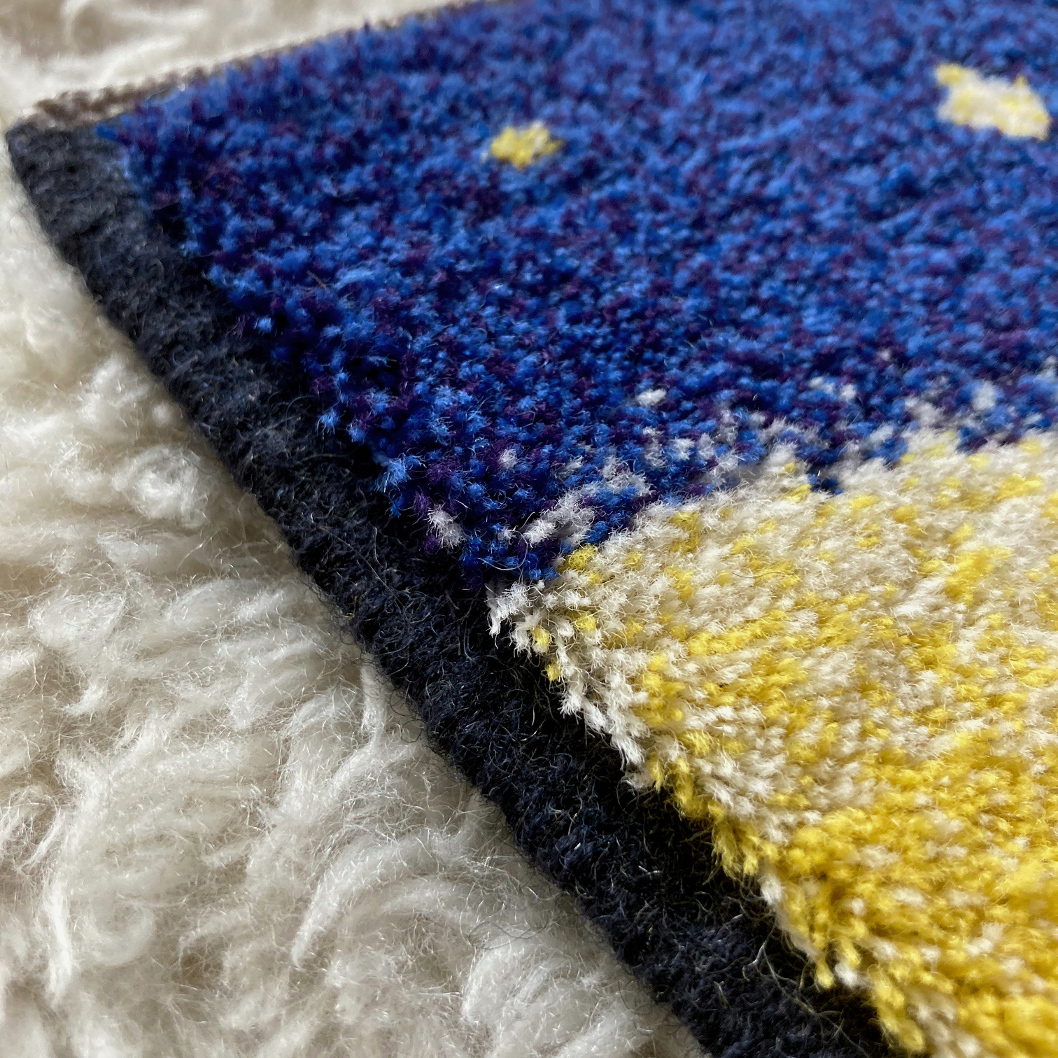
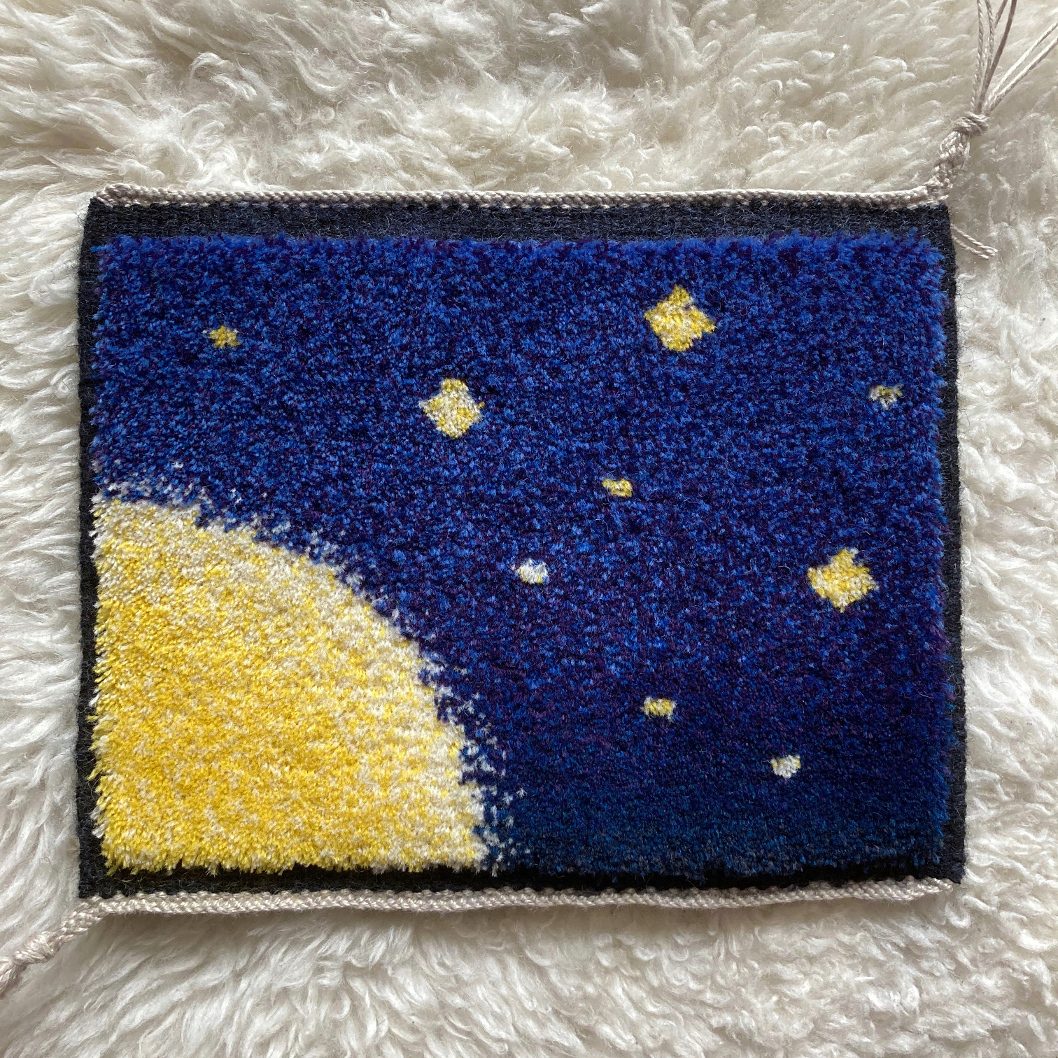
Here's the final result, which I'm calling Celestial.
I braided the warp ends with what Swedish calls an "oriental braid",
trimmed the pile so it is as even as possible,
and gave it a good steaming to fluff up the ends.
I couldn't be happier with it:
it's a beautiful piece, and taught me so much.
References
For more resources on carpet weaving, I recommend:
- If you read Swedish,
"Att Väva"
has a great primer on rya and a decent description of flossa.
- The classics "Handbok i vävning" - found in English as "Manual of Swedish handweaving" -
and "Väv gamla och glömda tekniker" also have some pages on the topic with useful details.
- The authors,
Arianna
and Miriam,
are great weavers of flossa and rya.
- Peter Colingwood's "The techniques of rug weaving" has a section about pile rugs.
See pages 224 and onwards in the version available from the textile archive at the University of Arizona,
starting in part 2 of the book
and continued in part 3.
Apr 30, 2020
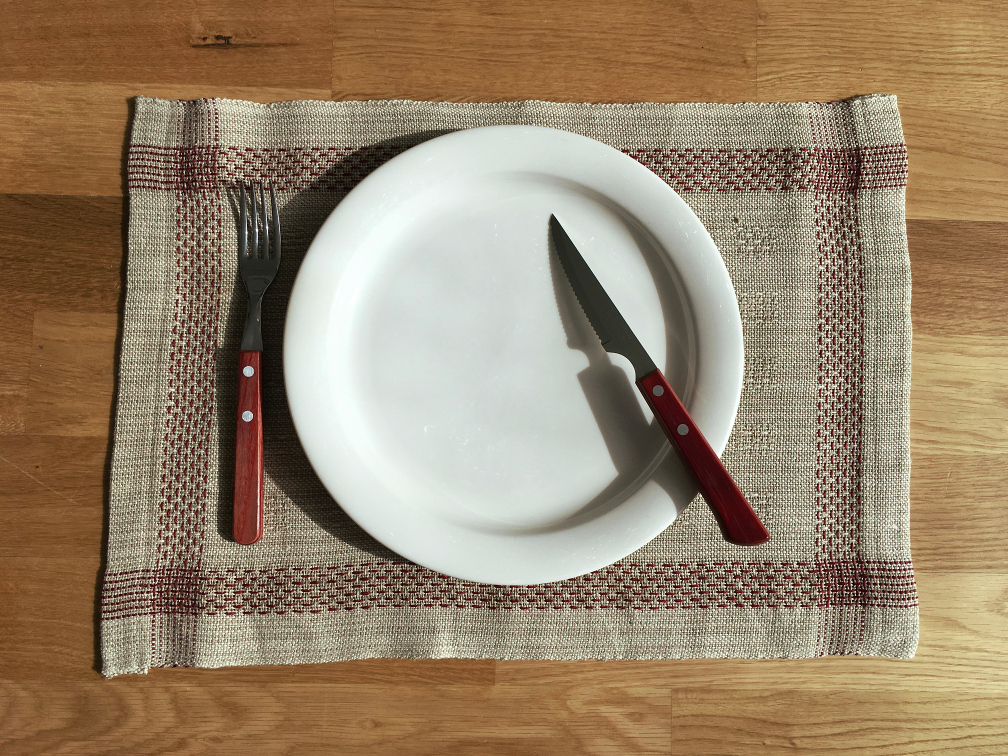
Back at Handarbetes Vänner, I had experimented with creating a frame out of lace weave.
The goal was to test knotted pile and get a piece that didn't need extra finishing,
and it turned out pretty good!
At the end of 2019, I decided to take the idea further,
by layering more frames inside each other.
The result was a similar design but with complex emergent patterns:
this article will specifically discuss the process that lead to the final draft.
Let's first cover the basics:
lace weaves are an entire family of structures derived from plain weave,
that add some floats to create openings in fabric.
Those holes might not be very visible while weaving, and only appear in finishing.
In Swedish, the most basic lace weave is called "stramalj".
The typical stramalj has alternating floats in the warp and the weft,
which creates a lovely tiling of crosses in the draft.
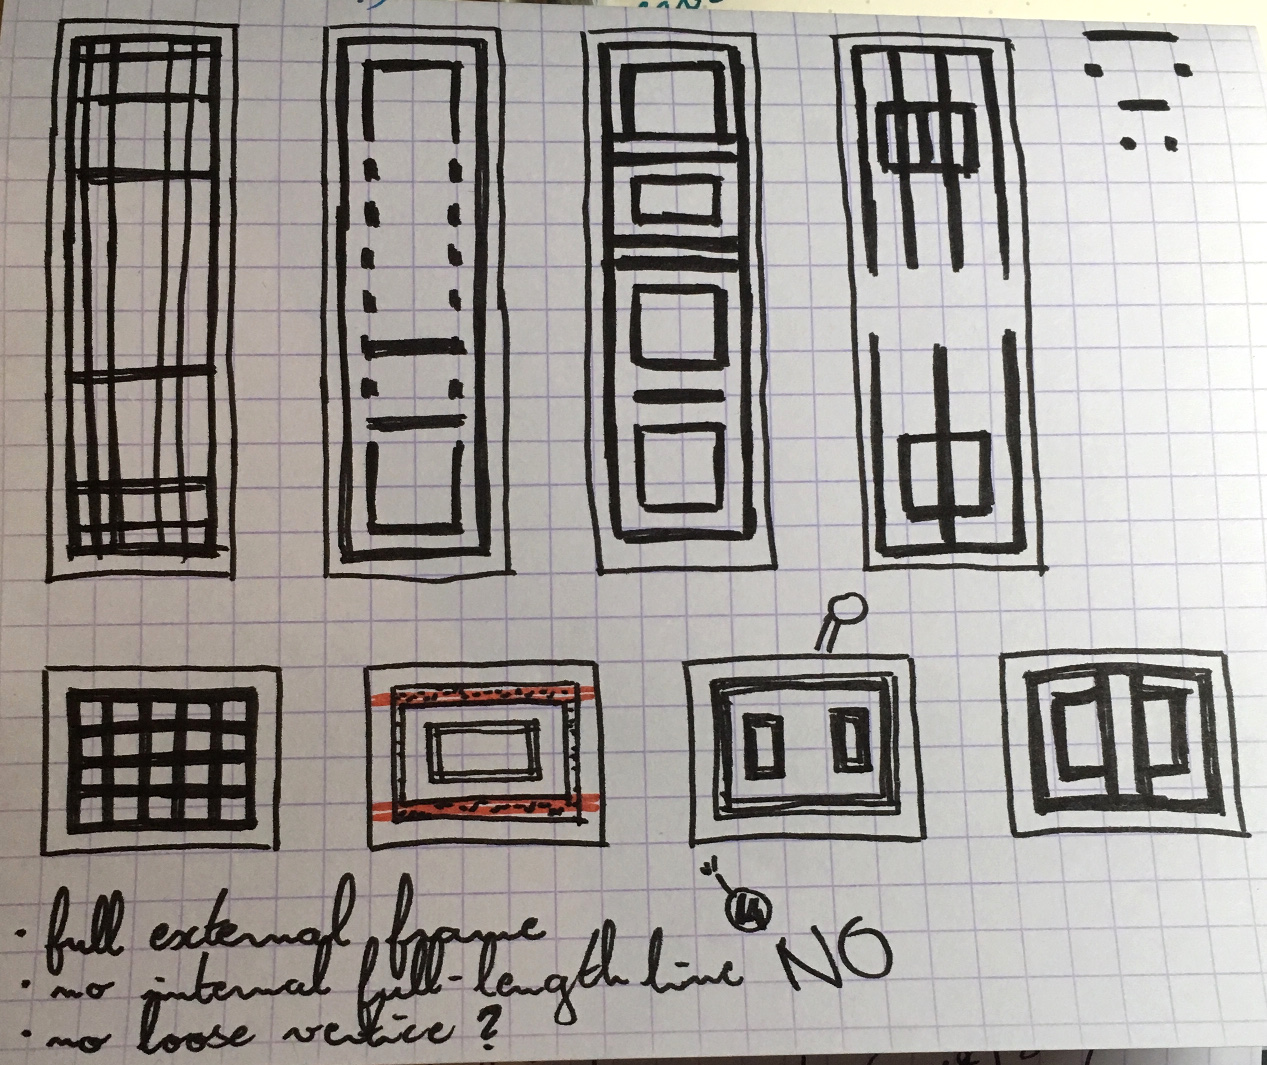
Since this design was going to have areas of either plain weave or lace,
I started sketching in black and white, with black lines representing the lace areas.
I only used vertical and horizontal lines, because that was going to translate to a woven structure more easily.
What emerged was simple shapes: lines, grids, rectangles in rectangles.
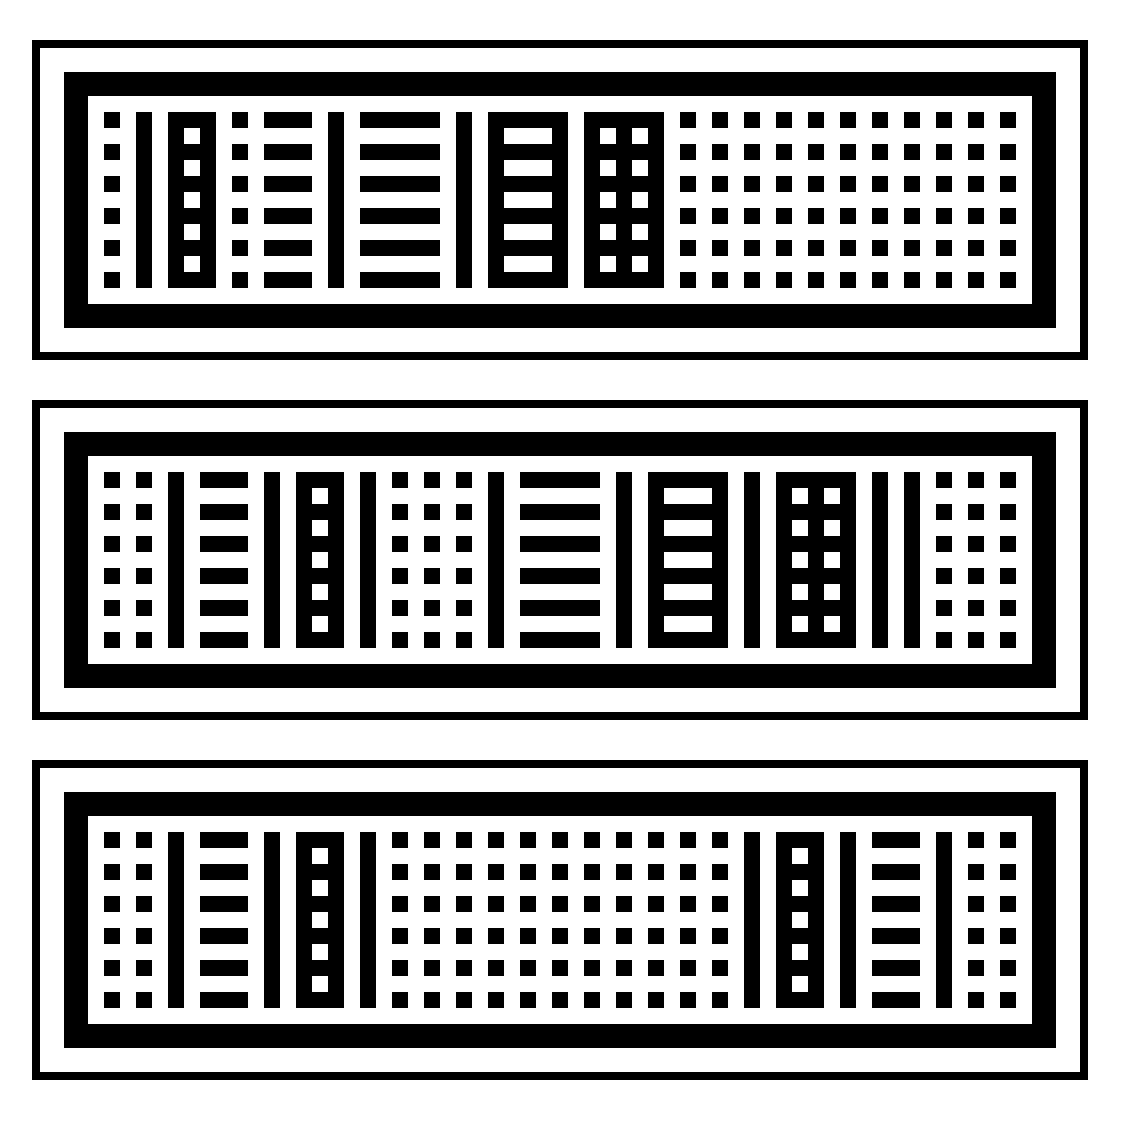
I then moved to the computer.
The digital sketches are where I decide scale.
I typically work at a very low resolution, and each pixel represents several threads:
working at that scale makes it easier to see the proportions the finished piece could have.
In this case, a 2x2 pixels block ended up representing a block with 5 lace crosses in it.
I kept doodling, and realized that a grid of dots could provide great variation.
I could leave the dots separated, or connect them into horizontal lines,
or create vertical lines.
This worked out to five building blocks:
- Plain weave only (hems);
- Lace over the entire width except for the outer edges (lace border);
- Lace borders, internal plain weave;
- Lace borders, internal dots;
- Lace borders, internal line.
The next step is to move to weaving software:
I use WeavePoint, specifically the Mini version.
That's where I lay out the exact structure and what every thread does.
In this case, it's also where I figured out how the structure was actually going to work!
Plain weave requires two shafts and two treadles.
Each lace block will use those two treadles, plus two of its own.
Since we have four lace blocks, plus plain weave, that's a total of ten shafts.
The resulting tie-up is optimized for elegance,
and it could use extra tweaking so the left and right foot alternate on each pick.
As it is, each foot will move between a plain weave and a lace treadle.
I wove this using two shades of natural 16/3 linen,
which gives a more rustic result than I would typically go for.
Weaving with thick yarn does come with few gotchas especially when a warp end breaks,
but it's pleasantly fast compared to very thin threads!
Linen generalities apply:
wet the yarn thoroughly before tying a knot,
humidify spools so the yarn will behave at the selvedges,
and spray water on the warp once in a while to keep it happy.
I also used an accent color in the lace border frame, to make it stand out even more.
Those threads were put on bobbins with a method similar to the one explained in the
selvedges
and leno
posts,
both to account for the difference in take-up and to allow for easier color changes during weaving.
The project is described in details in a pattern available as a free download on itch.io.
The document includes all the information you need to make your own version of the project:
materials, calculations, full draft, warp setup, color management and patterning.
PS: This post skips over the technicalities of block weaves.
Cally Booker over at Weaving Space has
a great intro to the topic
if you want something more thorough.
Dec 12, 2019
It's 2019.
We have machines to do everything.
Robots are taking our jobs, software is eating the world.
The only reason humans are still involved is that some machines are too complicated to make, for now.
So why weave by hand in 2019?
Why do things the hard, slow, expensive way?
This will be a somewhat rambly exploration of common arguments given in favor of making things by hand,
specifically textiles,
and my own approach to that question.
It will oversimplify some things and leave aside some complex matters that deserve their own piece.
Slow fashion
The evils of fast fashion are a common topic in textile,
especially in eco-conscious Sweden.
Sewing your own clothes, weaving your own fabric can then be a militant act.
Handmade things have better quality, or so the idea goes,
and they won't have weird chemicals in them,
or exploited labor in the production chain.
Natural dyeing is so much better for the planet.
Obviously this is an oversimplification:
the waste of products and energy is much larger with handmade goods.
With industrial scale comes efficiency - if only to increase profit.
A lot of the discussion is scaremongering about synthetics and chemicals.
Labor costs are much greater, but hobby makers don't count labor at all,
and many professionals are underpricing theirs brutally.
What slow fashion does have going for it is an encouragement to consume less.
Do we really need that many clothes, new things every season?
But fewer textiles doesn't have to mean handmade textiles:
I've personally been wearing fast fashion T-shirts threadbare over years,
and am starting to consider replacing my 25-year-old bath towel.
Slow fashion and ecological concerns, while important, are not what push me to weave by hand.
If only because as written above, many of the arguments strike me as scientifically questionable.
Tradition
Weaving is ancient.
It goes back thousands of years,
and even very elaborate techniques and tools were invented several centuries ago.
The Jacquard loom wasn't the first computer:
it just put into punch cards what the Chinese did with string way back in BCE.
Sweden was rural for a very long time,
organized in groups of farms that made nearly everything they used.
Go two generations back, and every family had at least one loom.
For many Swedish handweavers, the practice is about keeping traditions alive,
rediscovering and preserving patterns tied to a specific place,
and some fluffy idea of culture.
I'm from France.
My home country was industrialized early,
and making things yourself soon became about hobbies or excellence.
When we speak of preserving crafts traditions, it's not on the same scale:
it'll be old workshops, semi-industrial machines, manufactures.
When it's about individual skills, it will be about haute couture or other luxury goods.
For weaving, some examples are the Manufacture des Gobelins continuing to develop tapestry weaving,
and a couple companies in Lyon preserving silk weaving on ancient looms.
The factories in Northern France have mostly been turned into fancy apartments,
and La Manufacture des Flandres is now a museum,
showing the stages from the medieval handloom to the modern weaving machine.
While I like to learn and help preserve knowledge, it's not what drives me.
I can't in good conscience claim to preserve a tradition I was never a part of,
nor am I interested in repeating old patterns.
Self-care
Making things by hand is good for the modern worker, writes yet another large newspaper.
Could crafting solve the mental health crisis?
Just go pet clay for a couple hours, it'll prevent burnout.
You don't need union fights when you can go to an "office detox" at the end of a workday.
I'm the first one to make a case for every person having several energy buckets:
different tasks drain and fill different buckets,
and variation is good for most people.
Studies show a genuine positive impact,
but I still don't think crafts will save anyone from late capitalism and bad work conditions.
I've burned out. I'm burnt out.
I'm not sure it'll ever heal fully.
Leaning more into crafts wasn't so much self-care as a lack of other choices,
because I could not go on with programming and gamedev alone:
I needed to find something I had fun with again.
I then proceeded to almost burn out on my hobbies,
and again while studying weaving at HV.
So this is definitely not it.
Process nerdery
Weaving is complex,
or more accurately, it can be complex.
You can do a lot with plain weave,
like the rich illustrations of tapestries.
You can play with color and texture while sticking to very simple structures,
like in rag rugs.
But you can also go up to dozens of shafts,
draft mathematical theorems about woven structures,
adjust every stitch in a Jacquard-woven damask so it'll be perfect.
Like a good programmer,
I love systems,
complexity blooming from first principles,
emergent patterns and structures.
My interest in a Jacquard loom isn't so much to be able to weave illustrative pictures,
but that setting up more than 20 shafts would get really annoying.
As my math teacher said:
"To be good at math, you have to be lazy. But not too much".
I don't want the easy way out, but I do want to be smart about doing things efficiently.
Whether it's making complex shapes appear from a simple 8-shaft twill,
or overcomplexifying a traditional lace weave into a 10-shaft block extravaganza,
I like to take traditional structures and make them richer, more complex, more emergent.
It scratches the same itch as putting together a good API,
sliding the last component of a system in place,
and watching the computer do exactly what you wanted it to do.
Remove the locking pin, pass the first few wefts,
and see the cloth take shape, exactly as designed.
It's about the process,
and about a love of making STUFF.
Sometimes that stuff is software,
sometimes it's fifteen meters of delightful linen.
The major difference is that with weaving,
I work from materials and process,
more than the expected or desired final result.
What do I want to work with?
What's a good excuse to work with that?
But it's not about aimless play either.
Once the materials and the technique are chosen,
I make a plan,
I validate the choices by drafting or testing or sampling,
and I follow the plan,
adjusting only as required.
I'm a perfectionist:
not by always finding flaws in what I made,
but in always aiming to meet my own high standards,
and rising them every time.
Things that don't exist
Handweaving is still used in the textile industry.
It's impossible to beat when it comes to iterating quickly on small pieces.
Designers for major textile companies will draft their designs in a handloom,
testing patterns and materials.
You can't just go and setup hundreds of meters of something unproven.
It means small-batch making is at the heart of handweaving.
While that's what makes it unaffordable for most people,
it's also what allows me to make things that would not exist otherwise.
If I want to make a dozen towels with pride flags on them?
I can just set it up and go.
There's appeal in that freedom,
and in the political opportunities it creates.
The obvious sidenote
This entire ramble is written from a Western, industrialized perspective.
Production handweaving for daily use is plenty alive in many countries,
and not as a hobby as it generally is in Sweden.
I suggest looking at Textile Trails,
keeping an eye on Abby Franquemont's projects,
or following Marcia Harvey Isaksson's continuation of "Weavers in the West" over on Instagram.
