Apr 30, 2020
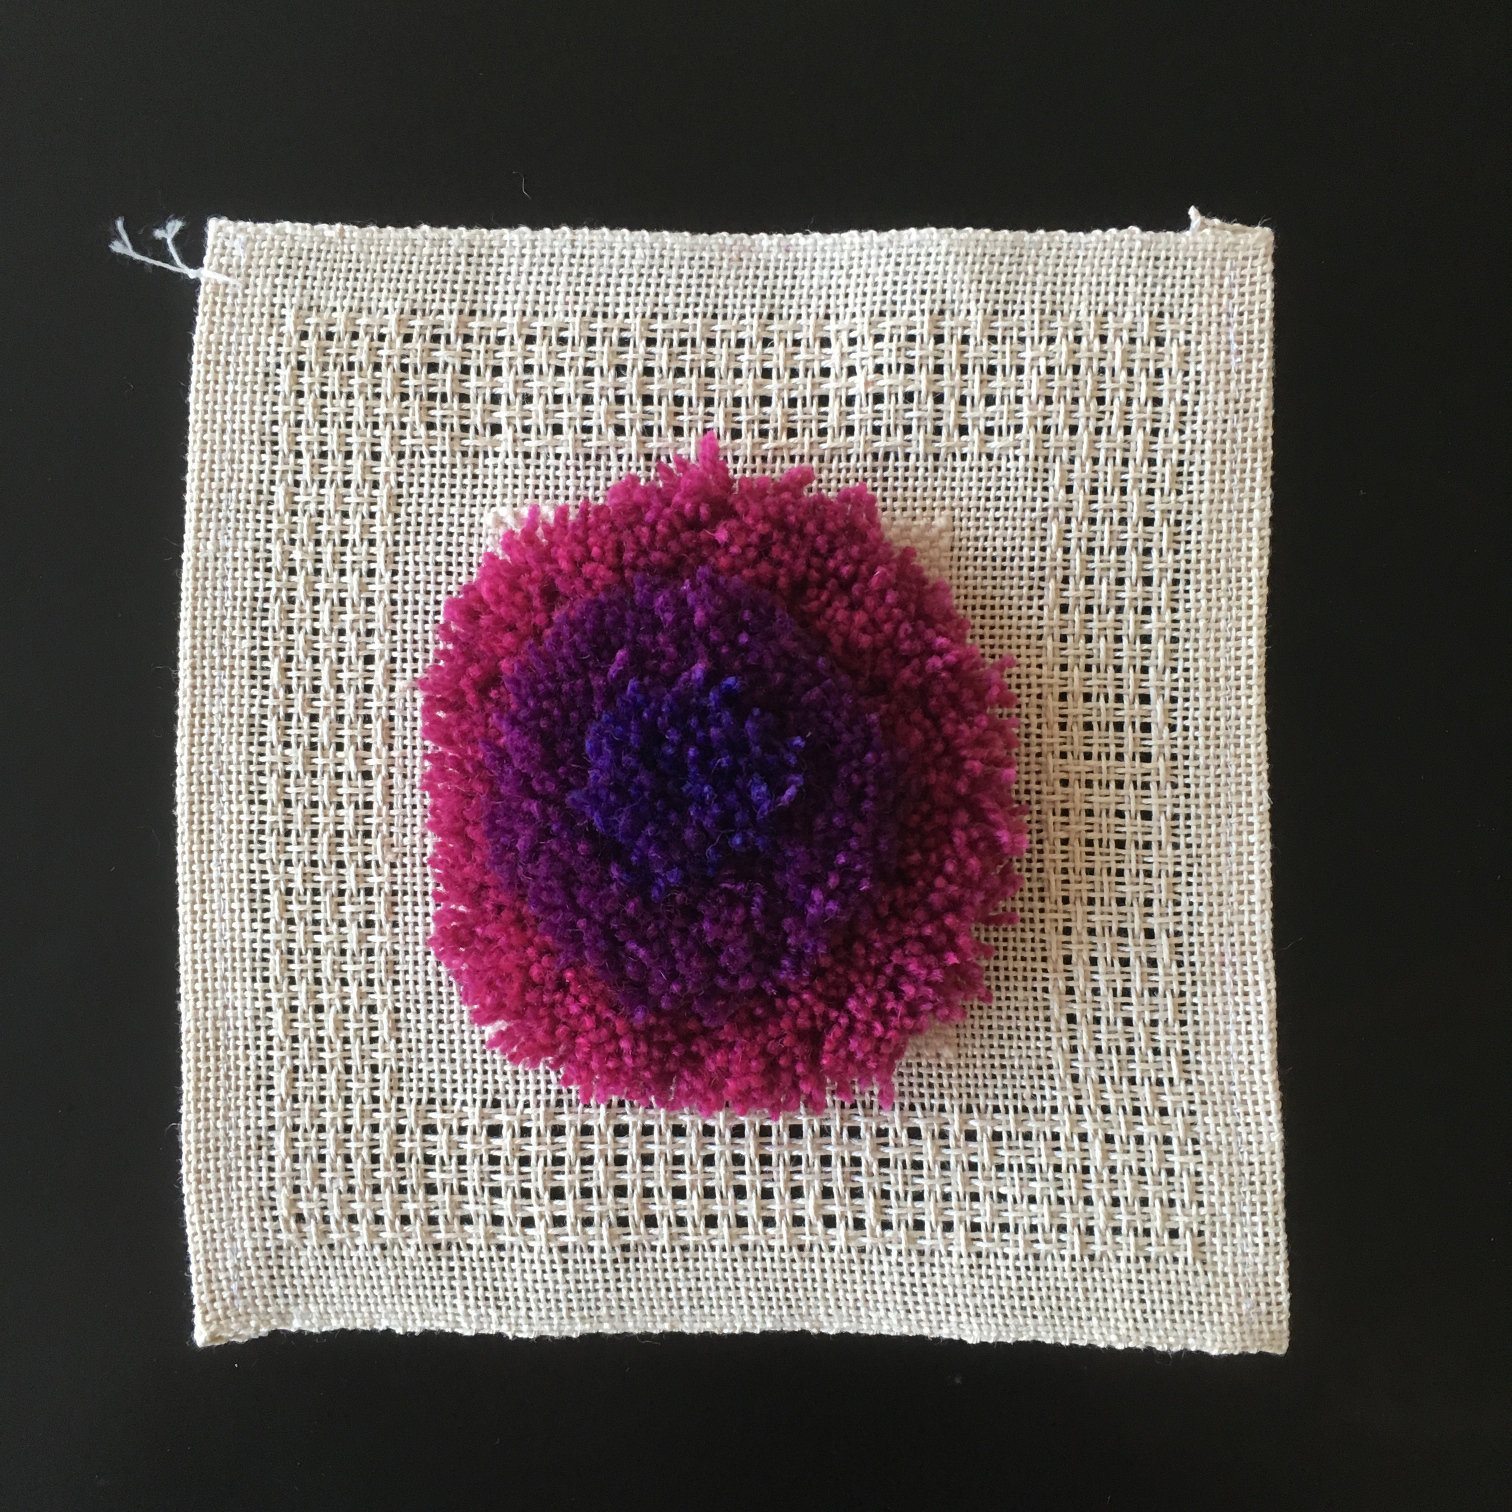
Back at Handarbetes Vänner, I had experimented with creating a frame out of lace weave.
The goal was to test knotted pile and get a piece that didn't need extra finishing,
and it turned out pretty good!
At the end of 2019, I decided to take the idea further,
by layering more frames inside each other.
The result was a similar design but with complex emergent patterns:
this article will specifically discuss the process that lead to the final draft.
Let's first cover the basics:
lace weaves are an entire family of structures derived from plain weave,
that add some floats to create openings in fabric.
Those holes might not be very visible while weaving, and only appear in finishing.
In Swedish, the most basic lace weave is called "stramalj".
The typical stramalj has alternating floats in the warp and the weft,
which creates a lovely tiling of crosses in the draft.
Since this design was going to have areas of either plain weave or lace,
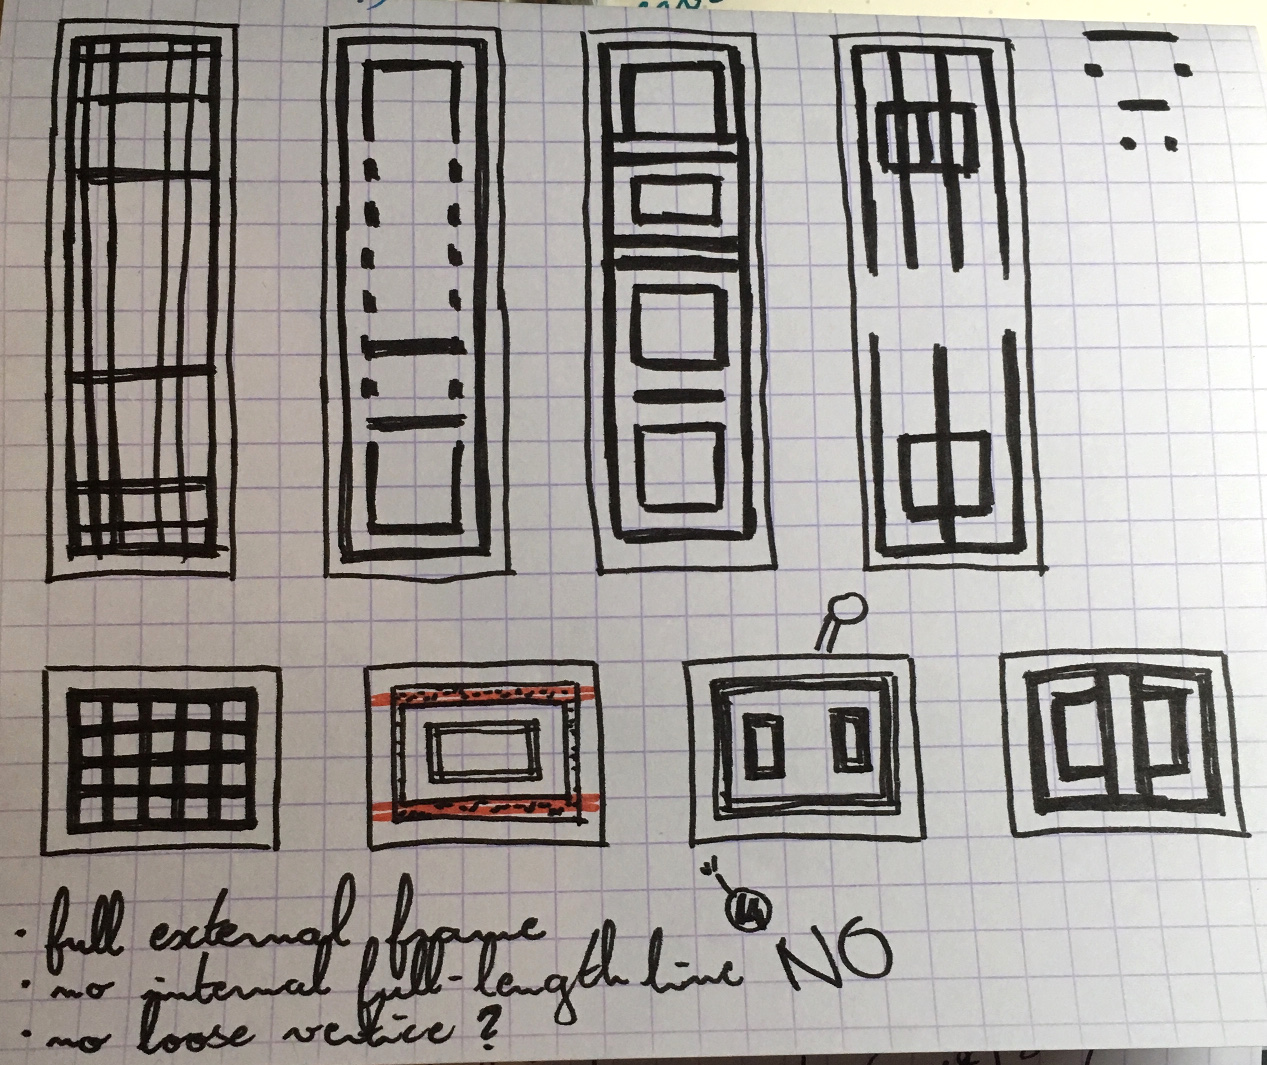
I started sketching in black and white, with black lines representing the lace areas.
I only used vertical and horizontal lines, because that was going to translate to a woven structure more easily.
What emerged was simple shapes: lines, grids, rectangles in rectangles.
I then moved to the computer.
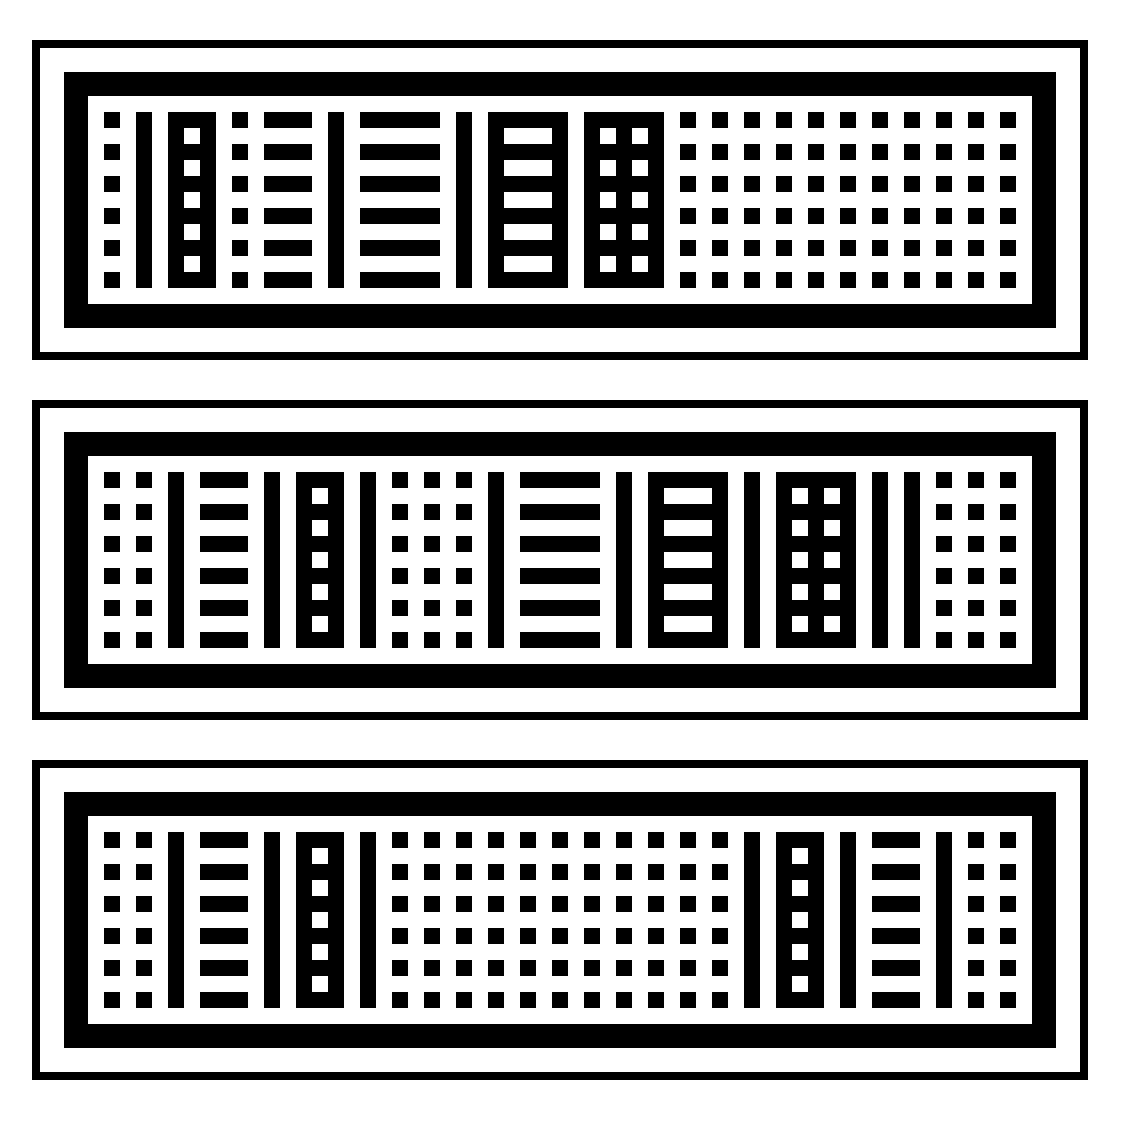
The digital sketches are where I decide scale.
I typically work at a very low resolution, and each pixel represents several threads:
working at that scale makes it easier to see the proportions the finished piece could have.
In this case, a 2x2 pixels block ended up representing a block with 5 lace crosses in it.
I kept doodling, and realized that a grid of dots could provide great variation.
I could leave the dots separated, or connect them into horizontal lines,
or create vertical lines.
This worked out to five building blocks:
- Plain weave only (hems);
- Lace over the entire width except for the outer edges (lace border);
- Lace borders, internal plain weave;
- Lace borders, internal dots;
- Lace borders, internal line.
The next step is to move to weaving software:
I use WeavePoint, specifically the Mini version.
That's where I lay out the exact structure and what every thread does.
In this case, it's also where I figured out how the structure was actually going to work!
Plain weave requires two shafts and two treadles.
Each lace block will use those two treadles, plus two of its own.
Since we have four lace blocks, plus plain weave, that's a total of ten shafts.
The resulting tie-up is optimized for elegance,
and it could use extra tweaking so the left and right foot alternate on each pick.
As it is, each foot will move between a plain weave and a lace treadle.
I wove this using two shades of natural 16/3 linen,
which gives a more rustic result than I would typically go for.
Weaving with thick yarn does come with few gotchas especially when a warp end breaks,
but it's pleasantly fast compared to very thin threads!
Linen generalities apply:
wet the yarn thoroughly before tying a knot,
humidify spools so the yarn will behave at the selvedges,
and spray water on the warp once in a while to keep it happy.
I also used an accent color in the lace border frame, to make it stand out even more.
Those threads were put on bobbins with a method similar to the one explained in the
selvedges
and leno
posts,
both to account for the difference in take-up and to allow for easier color changes during weaving.
The project is described in details in a pattern available as a free download on itch.io.
The document includes all the information you need to make your own version of the project:
materials, calculations, full draft, warp setup, color management and patterning.
PS: This post skips over the technicalities of block weaves.
Cally Booker over at Weaving Space has
a great intro to the topic
if you want something more thorough.
Sep 30, 2019
Getting good selvedges in handweaving is notoriously tricky.
It's not an issue when making fabric that will be sewn into clothes:
but when creating scarves, blankets, bedsheets or other convenient rectangular items,
clean and sturdy selvedges are marks of a competent weaver.
How the shuttle is passed and at what angle makes a major difference,
but that's not the topic today.
We're instead going to look at how the weave structure itself sometimes makes the selvedges messy,
and how to adress that problem.
It's all about the last threads on the side of the warp.
In plain weave, every thread will change shed with every pick:
this mean that the weft will always wrap around the very last thread.
That creates a stable selvedge, where the only - non-trivial! - problems to solve
are warp density in the reed and weft tension.
But as soon as we move to twills, problems appear.
New weavers often wonder why their twill selvedges look good on one side, but a mess on the other:
it's due to the last thread(s) staying in the same shed, preventing the weft from wrapping around it.
In certain drafts, notably in a simple 2-2 balanced twill,
this will result in warp ends never getting bound at all on one side.
The schematic below show how things look with the weft loose:
examine the path of the weft, and see how it never never loops around the last warp end on the left side.

Note that for extra confusion, which side is messy will vary depending on the treadling in relation to the shuttle direction.
For example, if the last thread stays in the same shed between treadle 1 and 2,
but switches shed between treadle 2 and 3,
the selvedge will be fine if the shuttle is on that side between treadles 2 and 3,
but remain unbound if the shuttle is on that side between treadles 1 and 2.
This is what makes balanced even twills especially problematic:
the shuttle direction will always be in sync with the treadling,
and the unbound side will always be the same.
See the schematics below for how things look after the weft is pulled in,
and which warp end is up loose depending on the direction of the first pick.


2-2 balanced twill is an easy and especially pathological example,
but other structures can have similar problems.
Satins that use many shafts will rarely bind on the selvedge.
Complex twills may end up with random-looking warp floats on the sides.
Those floats can make the cloth weaker, and look messy.
So how do we fix them?
One solution can be to leave the last thread on each side unheddled,
and manually ensure that the shuttle goes around them.
Staying consistent is key:
the weaver needs to remember that, for example, the shuttle goes over the first thread when entering,
and under the last thread when exiting.
This will artificially bind that thread in plain weave, creating a cleaner edge.
But since different structures have different take-up,
that last warp thread will eventually have different tension.
This is why silk weaving looms have extra bobbins for the selvedges:
they are woven in a different structure, typically a plain weave variant with two picks in each shed, and need separate tensioning.
As handweavers who need a single selvedge thread,
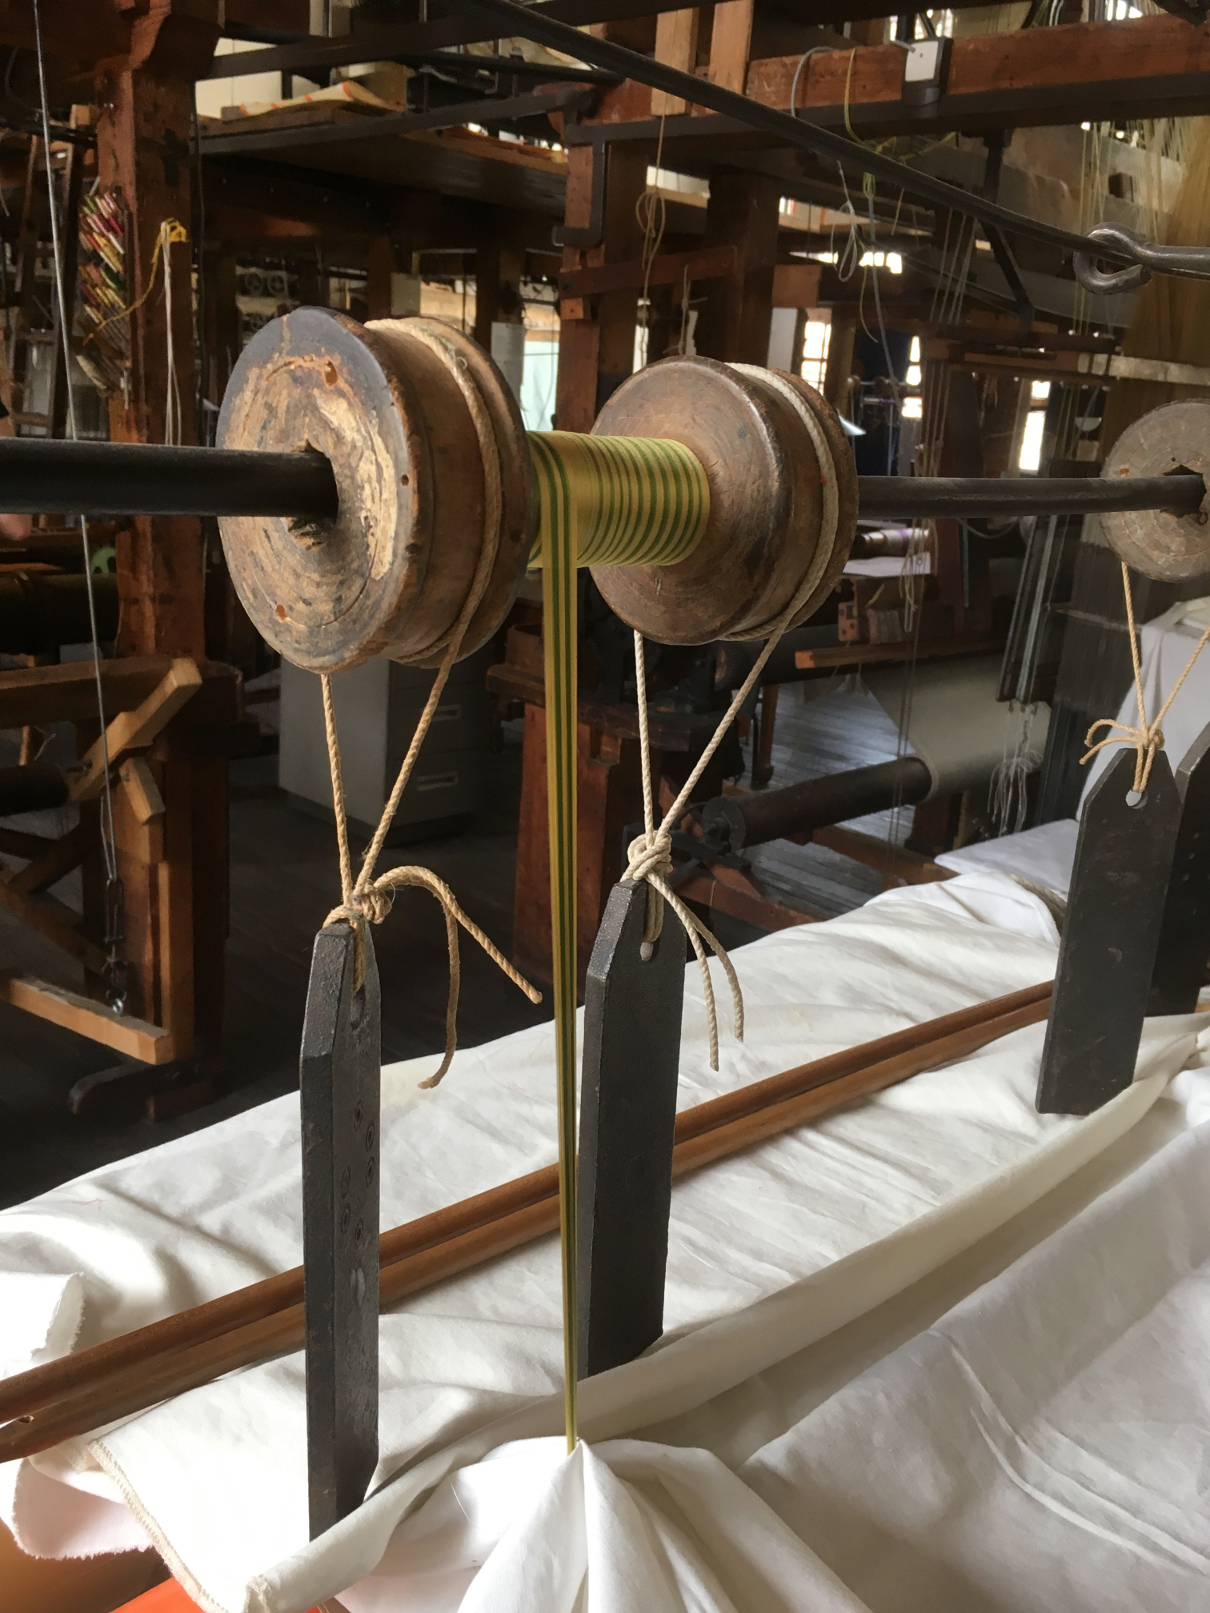
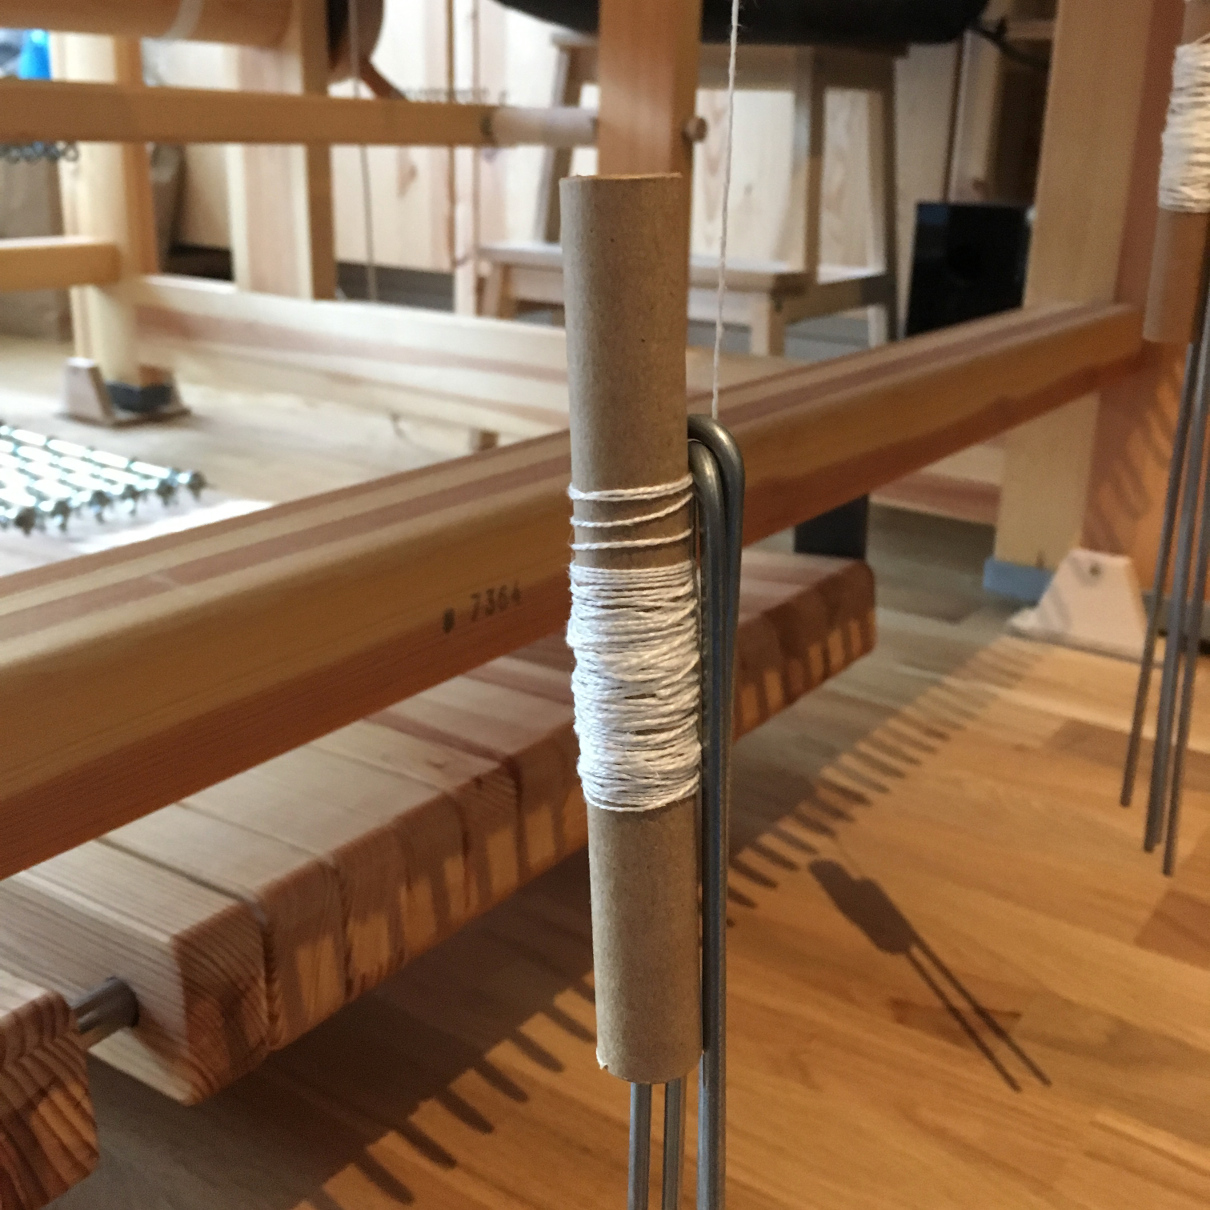
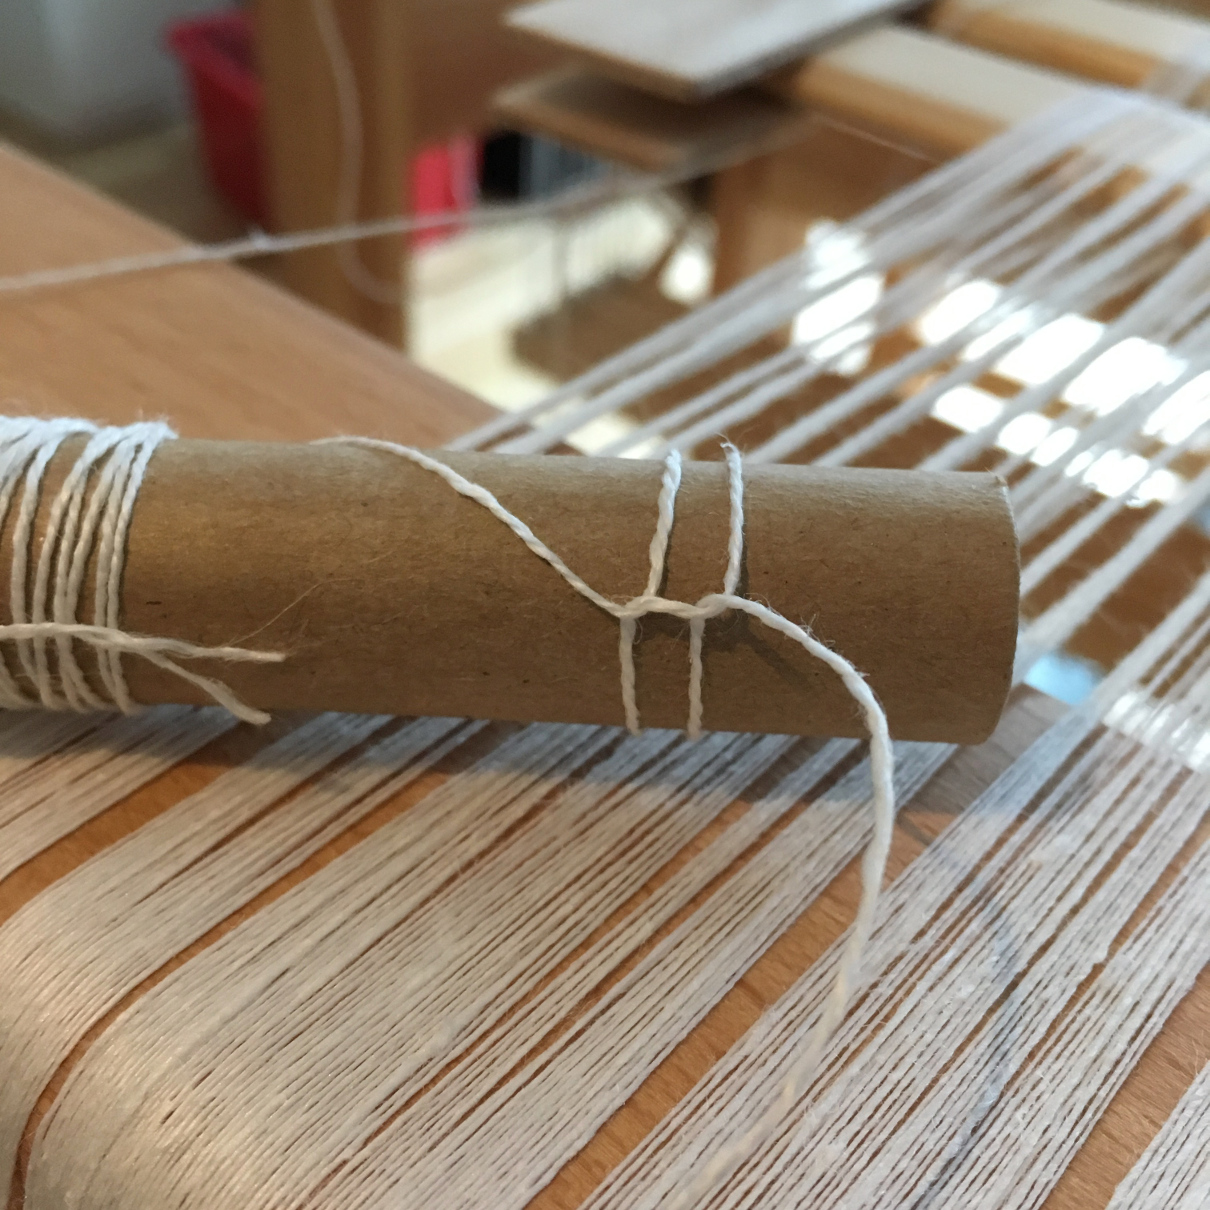
we can imitate that somewhat by putting that extra thread on a separate bobbin dangling at the back of the loom.
U-shaped weights intended for drawloom setup are a very good way to weigh down those bobbins,
several can be used if high tension is required.
To prevent the bobbin from unspooling freely,
the thread can be put in a double half-hitch:
this creates enough friction to prevent unwinding,
but is still easy to pull extra length from when the warp is advanced.
Note that due to this thread being on the edge and tensioned separately,
it might need to be sturdier than the main warp yarn.
For instance, my towels and washclothes are woven in 16/1 linen,
but my extra selvedge threads are 16/2 for better solidity.
Making sure to wrap around that unheddled selvedge thread every time is error-prone.
But if we have two shafts to spare, and compatible treadling, we can make it easier.
One thread on each side is put on its own shaft, which is then tied up in plain weave.
This mean the number of structural treadles needs to be even,
with continous treadling that doesn't jump between e.g. treadles 1 and 3.
A 2-2 balanced twill or an 8-shaft satin are great candidates, for instance.
Note that it's in my opinion easier to shuttle if the extra thread is down on the side of the shuttle's entrance.
The tie-ups below are provided in Swedish contramarch style.
Note that this could also be done with a single shaft tied up in plain weave,
and both extra threads on that shaft.
But I find weaving easier if the extra threads aren't in the same shed.
I need to run some tests to see how it affects the finish of the cloth!
The obvious limitation, as explained above, is that odd treadle counts are not compatible.
For example, the very common 5-shaft satin can't benefit from this.
On a countermarch loom, some double-treadling shenanigans might be an option,
but that's a problem for another time!
This also won't magically make tension issues go away:
the shuttle still needs to be passed carefully so it doesn't pull too tight,
and so it gives enough extra weft for take-up.
Iterating on the density of the selvedges in the reed is also vital.
My current WIP has only gotten breakadges on thread 4 on either side, for example:
this means the warp is not dense enough in the last two dents,
causing extra friction.
The result of these drafts are tidy, sturdy selvedges that are easy to weave.
There are no extra warp floats or uneven tension issues,
which makes for faster weaving and better fabric.
Items that use this technique are the pink diamond twill wool scarves and the white linen washclothes.
The white linen towels used unheddled threads
because they're woven in 10-shaft dräll with a 5-shaft satin as the base.
May 12, 2019
Back in July 2018, I decided that I needed carpets.
The most urgent one was for the loom, so the treadles would not slam against the floor all the time.
I'd also make one for the spinning wheel so it wouldn't slide around,
and why not one for our top floor while at it?
That meant something sturdy, flat, decently fast to weave,
and easily washable.
I settled on cotton warp rep, which is tight, flat, as sturdy as it gets, and machine-washable.
Warp rep is basically plain weave, but with a strong color effect due to the varying thickness of the weft.
Warp ends alternate color, meaning a single color is on the top layer in each shed:
so alternating a thick and a thin weft will make one color dominate.
I had leftovers of Borgs' 8/2 cotton, and set up a small sample warp with that in red and black.
The final project used the same yarn quality, in dark grey and light green-blue.
I used that same yarn as the thin weft, and a stranded cotton yarn from Borgs called "Midi" as the thick weft.
I would ideally have wanted it in dark grey to match the warp,
but it's only available in a few colors, and I settled on black.
This technique requires very high warp density to fully hide the weft,
theoretically as dense as the warp yarn can be wound, but doubled.
Borgs' 8/2 cotton makes about 14 wraps per centimeter.
I mistakenly started my first sample at that density, 70/10,1-2 which of course turned out way too loose.
I re-sleyed at 70/10,1-3, resulting in 21 threads per centimeter, which was still a bit loose
in addition to looking oddly uneven due to the 3 threads per dent.
Since warp rep is plain weave, keeping an even number of ends per dent is better, to match the structure.
I re-sleyed again at 24 threads per centimeter, 60/10,1-4, which finally turned out great.
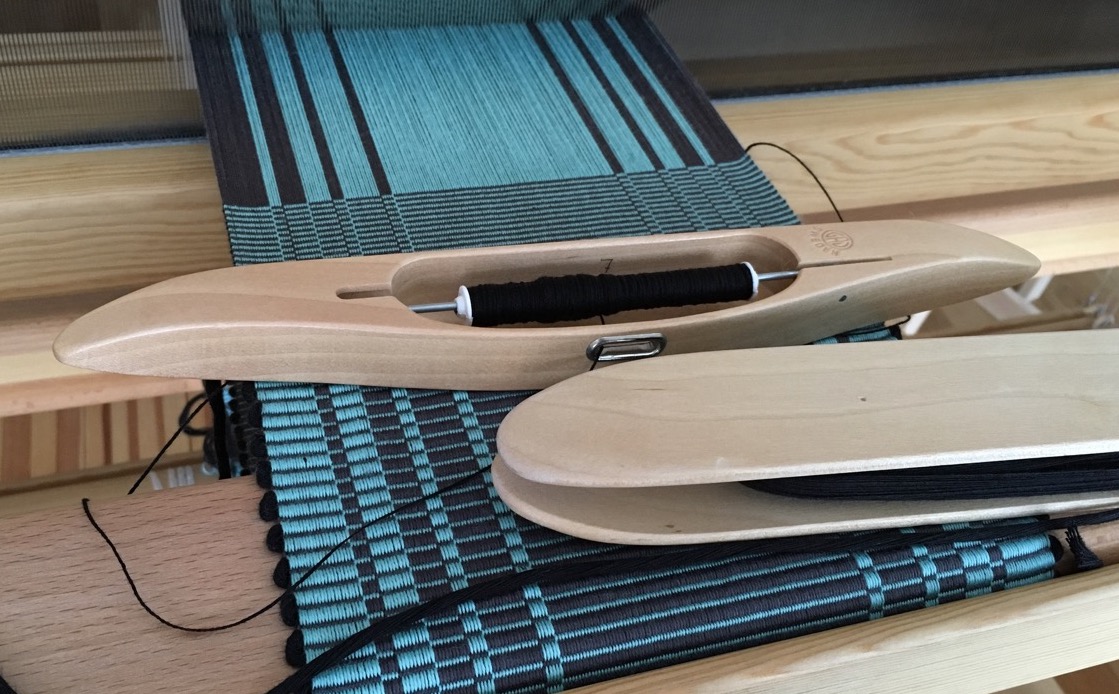
Note that the pictures below are from another project using the same quality,
not the wider carpet warp.
With such a high warp density, the warping was going to take forever.
I needed 1680 threads!
I therefore warped with 4 threads at once, 2 of each color.
Note that the cross should have at least 2 threads in each section:
otherwise, it's impossible to swap the order of warp ends to create different color blocks.
I learned that the hard way when setting up another, narrower project with the same quality,
which is the one photographed for this article.
As recommended by Ulla Cyrus' Handbok i vävning,
I threaded on 4 shafts in the order 1-3-2-4, to reduce friction.
That means shafts 1 and 2 will move together, rather than 1 and 3.
That improvement was vital, because it turns out that the wider the warp, the higher the friction,
and the harder the treadling.
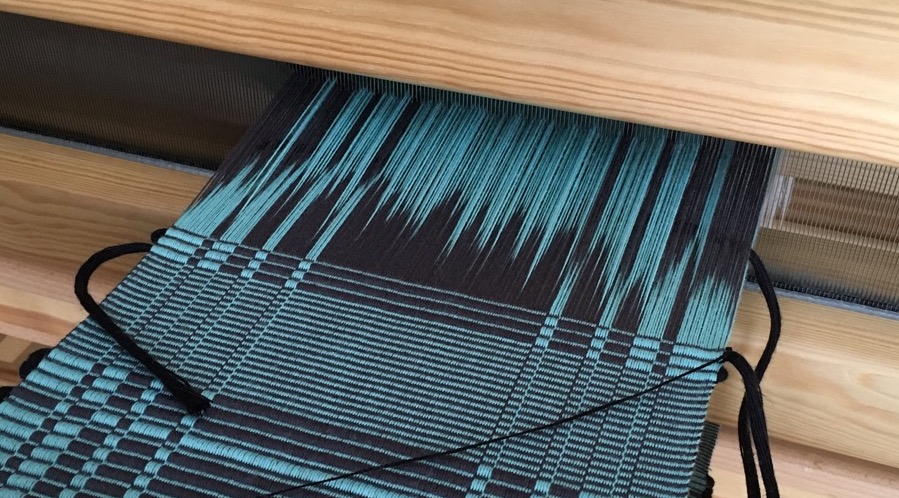
The weaving process has a few gotchas as a result.
Stepping hard on the treadles is definitely a must, as is using the reed to open the shed a bit better.
Since two wefts are used, making sure they twist nicely on the edge is important to lock in the last warp end.
That can be done by always putting the unusued shuttle to the side of the weaving,
and passing the active shuttle over or under it depending on what's needed.
My full process ended up being:
- Pass one weft, making sure to twist around the other weft.
- Stretch it straight inside the shed, leaving a loop at the end. There's no weft take-up in warp rep, and you'll need that extra to perfect the previous row.
- Beat. The selvedges will look messy, that's normal.
- Using your fingers, open the selvedges down to the previous pick.
- Re-tension the end of the previous row using the loop you left earlier, and stretch the weft fully.
- Beat again, locking the weft fully in place.
- Switch treadle and repeat with the other weft quality.
The picture below shows the opening of the selvedges.
Click to go to a full video of the weaving process (about 14MB).
Regarding gear, I used a classic boat shuttle for the thin weft,
and a big manually wound "double-ski" rug shuttle for the thick weft.
Joining a new length of this thick weft needs to be done carefully.
It's way too thick to be doubled up over a few centimeters, as it typically done.
Instead, it's best to cut it along a diagonal and line it up just right with the new length.
You can probably change it only in selvedges, too, but that would mean dangling bits!
Note that the draft below is in Swedish style, with threading at the bottom, treadling on the right,
and black squares in the tie-up indicating shafts going down.
Horizontal color changes are achieved by swapping the order of the different colors of warp ends.
Vertical color changes are achieved by doing two picks of thin weft to swap which warp color is on top with the thick weft.
