Back in July 2018, I decided that I needed carpets.
The most urgent one was for the loom, so the treadles would not slam against the floor all the time.
I'd also make one for the spinning wheel so it wouldn't slide around,
and why not one for our top floor while at it?
That meant something sturdy, flat, decently fast to weave,
and easily washable.
I settled on cotton warp rep, which is tight, flat, as sturdy as it gets, and machine-washable.
Warp rep is basically plain weave, but with a strong color effect due to the varying thickness of the weft.
Warp ends alternate color, meaning a single color is on the top layer in each shed:
so alternating a thick and a thin weft will make one color dominate.
I had leftovers of Borgs' 8/2 cotton, and set up a small sample warp with that in red and black.
The final project used the same yarn quality, in dark grey and light green-blue.
I used that same yarn as the thin weft, and a stranded cotton yarn from Borgs called "Midi" as the thick weft.
I would ideally have wanted it in dark grey to match the warp,
but it's only available in a few colors, and I settled on black.
This technique requires very high warp density to fully hide the weft,
theoretically as dense as the warp yarn can be wound, but doubled.
Borgs' 8/2 cotton makes about 14 wraps per centimeter.
I mistakenly started my first sample at that density, 70/10,1-2 which of course turned out way too loose.
I re-sleyed at 70/10,1-3, resulting in 21 threads per centimeter, which was still a bit loose
in addition to looking oddly uneven due to the 3 threads per dent.
Since warp rep is plain weave, keeping an even number of ends per dent is better, to match the structure.
I re-sleyed again at 24 threads per centimeter, 60/10,1-4, which finally turned out great.
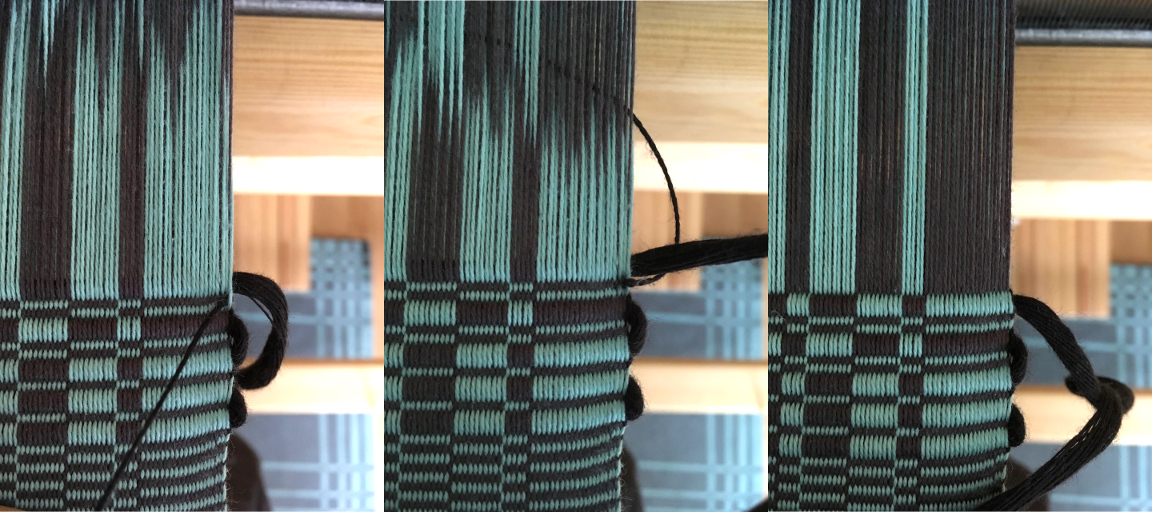
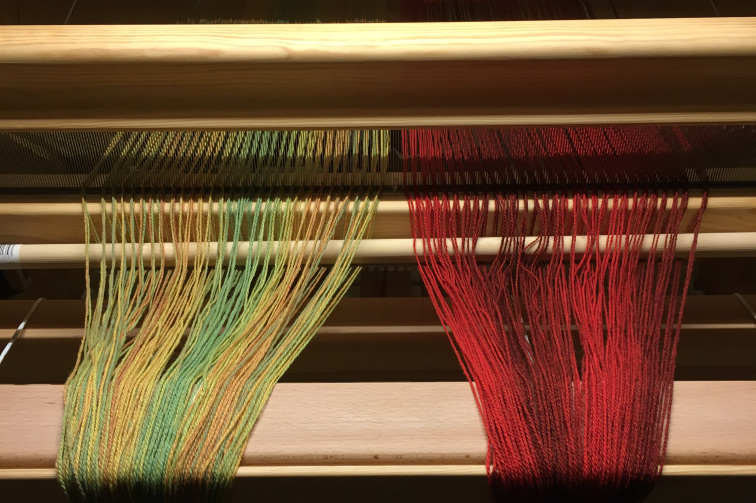
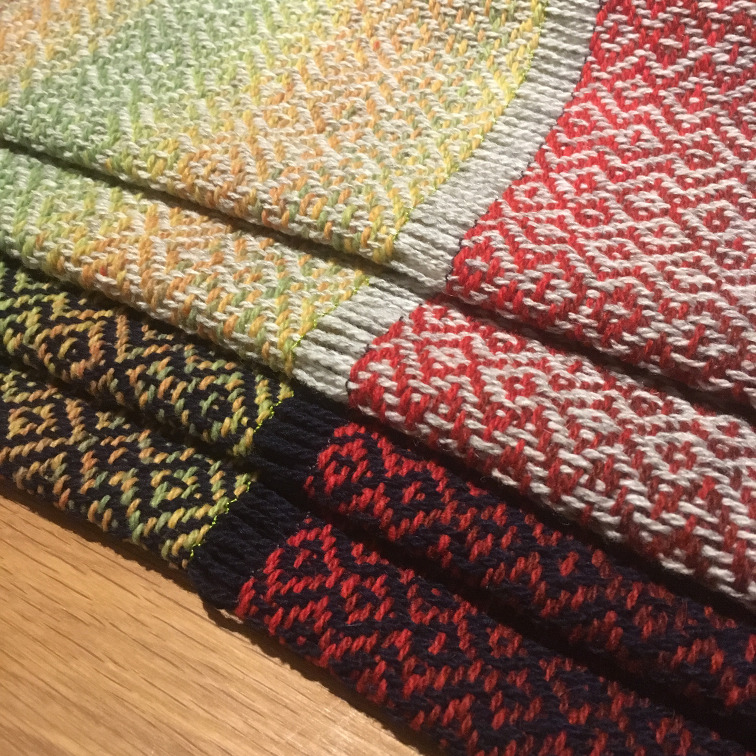
Note that the pictures below are from another project using the same quality,
not the wider carpet warp.
With such a high warp density, the warping was going to take forever.
I needed 1680 threads!
I therefore warped with 4 threads at once, 2 of each color.
Note that the cross should have at least 2 threads in each section:
otherwise, it's impossible to swap the order of warp ends to create different color blocks.
I learned that the hard way when setting up another, narrower project with the same quality,
which is the one photographed for this article.
As recommended by Ulla Cyrus' Handbok i vävning,
I threaded on 4 shafts in the order 1-3-2-4, to reduce friction.
That means shafts 1 and 2 will move together, rather than 1 and 3.
That improvement was vital, because it turns out that the wider the warp, the higher the friction,
and the harder the treadling.
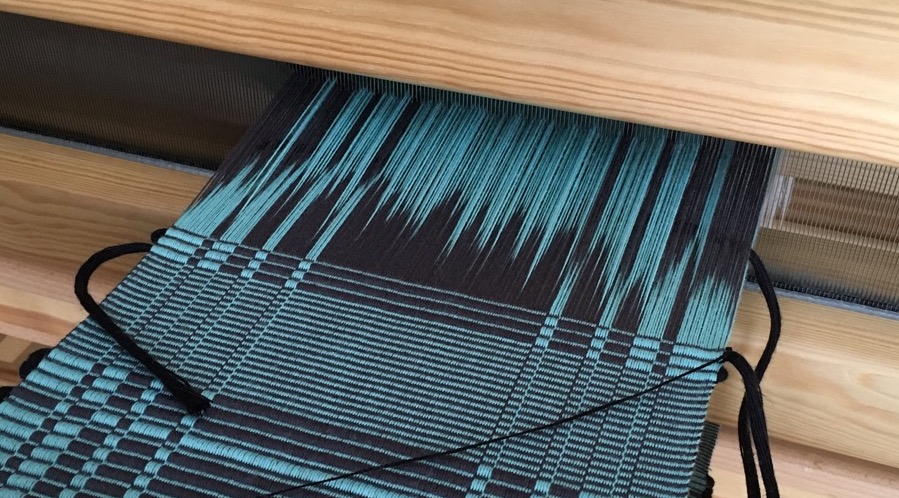
The weaving process has a few gotchas as a result.
Stepping hard on the treadles is definitely a must, as is using the reed to open the shed a bit better.
Since two wefts are used, making sure they twist nicely on the edge is important to lock in the last warp end.
That can be done by always putting the unusued shuttle to the side of the weaving,
and passing the active shuttle over or under it depending on what's needed.
My full process ended up being:
- Pass one weft, making sure to twist around the other weft.
- Stretch it straight inside the shed, leaving a loop at the end. There's no weft take-up in warp rep, and you'll need that extra to perfect the previous row.
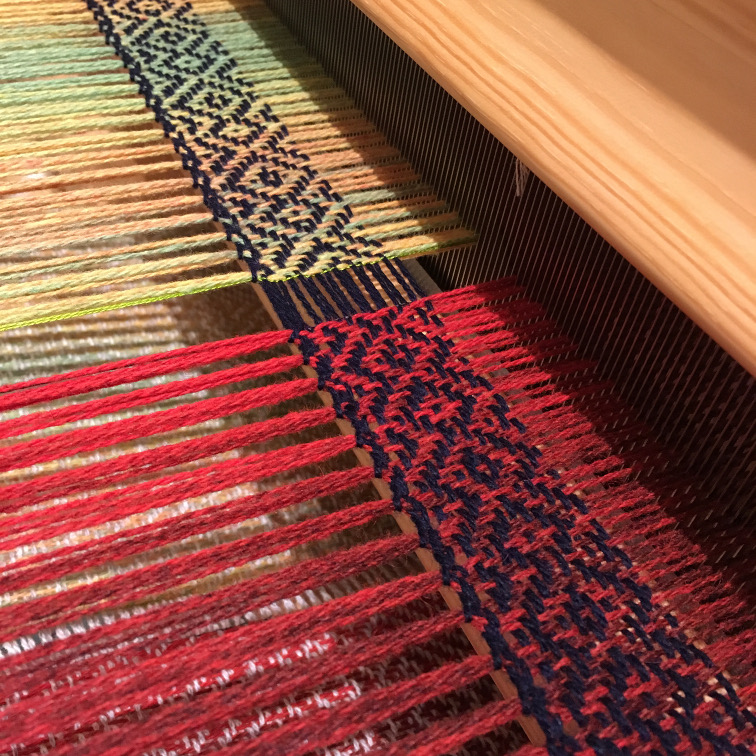
- Beat. The selvedges will look messy, that's normal.
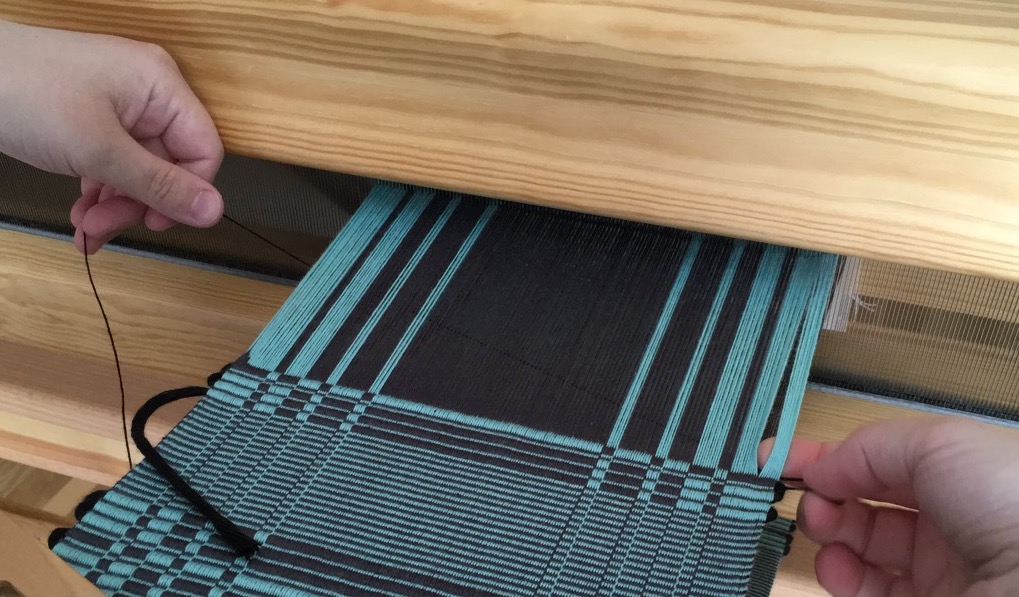
- Using your fingers, open the selvedges down to the previous pick.
- Re-tension the end of the previous row using the loop you left earlier, and stretch the weft fully.
- Beat again, locking the weft fully in place.
- Switch treadle and repeat with the other weft quality.
The picture below shows the opening of the selvedges.
Click to go to a full video of the weaving process (about 14MB).
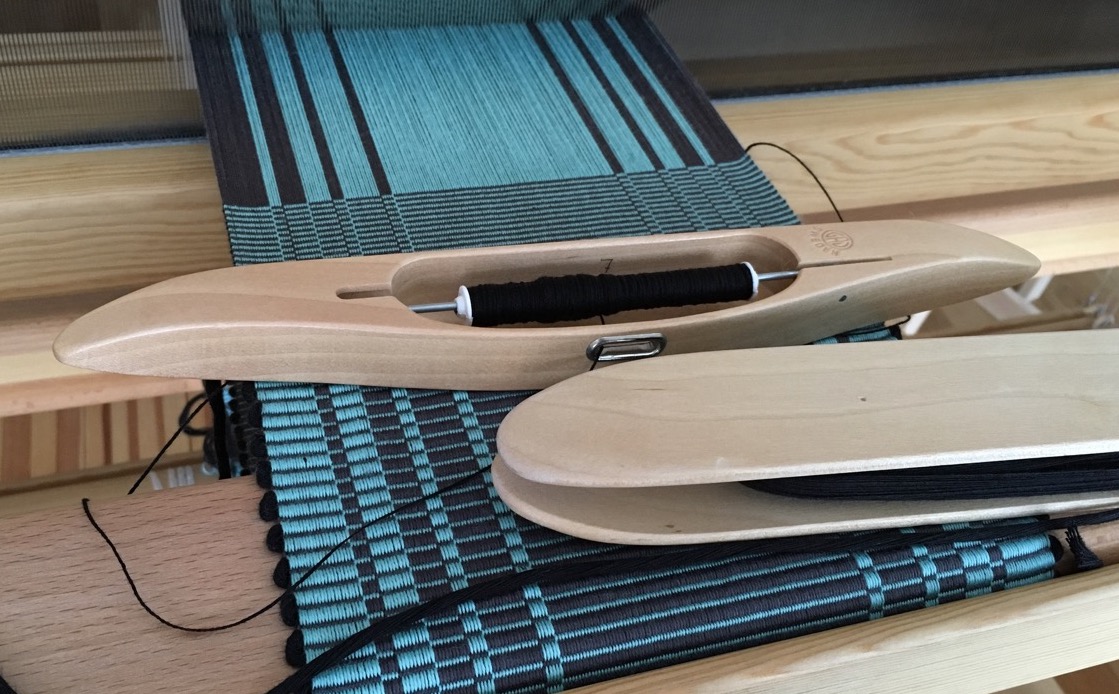
Regarding gear, I used a classic boat shuttle for the thin weft,
and a big manually wound "double-ski" rug shuttle for the thick weft.
Joining a new length of this thick weft needs to be done carefully.
It's way too thick to be doubled up over a few centimeters, as it typically done.
Instead, it's best to cut it along a diagonal and line it up just right with the new length.
You can probably change it only in selvedges, too, but that would mean dangling bits!
Note that the draft below is in Swedish style, with threading at the bottom, treadling on the right,
and black squares in the tie-up indicating shafts going down.
Horizontal color changes are achieved by swapping the order of the different colors of warp ends.
Vertical color changes are achieved by doing two picks of thin weft to swap which warp color is on top with the thick weft.
As I was scrolling on Instagram, as one does, I saw @balgarviewweaving weaving several scarves at once, next to each other.
I immediately wondered how this was possible: I focus on weaving structure and technique,
and had just woven some wool scarves, frustrated that something so narrow could only be done one at a time.
If I could just weave several next to each other, that could go faster, and make them more affordable.
The Instagram post mentioned "loop de doupe", which I hadn't heard of before.
A-googling I went, eventually finding that "doupe" is the name for the special heddles used in leno.
That was a word I'd heard before, specfically for gauze weaving, and it involves something you just do not do in normal weaving:
twisting warp threads with each other.
Armed with this new keyword, I went researching more deeply, to find schematics and instructions.
The University of Arizona's extensive archive of textile documents delivered,
with a series of detailed articles about gauze weaving from Posselt's Textile Journal.
The first one had what I needed, explaining how the threads moved and how the loom was setup.
However it was designed for a jack loom, where the shafts are only left in place or lifted.
I've got a countermarch loom, so I needed to adapt things to work with shafts that are both lifted and dropped.
Which is why I'll now explain how the technique works, how I setup my loom, what results I got and what I'll improve next time.
I've mentioned that leno involves twisting warp threads with each other, but what does that mean?
In a normal weaving setup, warp threads only move up or down, so the weft goes under or above them.
With leno, they can also be pulled to the side, creating a twist that the weft will hold in place,
and that will hold the weft in place, too.
Some pickup techniques do this for specific effects, but are obviously very time consuming.
A leno setup can automate the twisting, which is how fabrics like gauze are woven.
On a smaller scale, the twisting can be done only on edge threads, creating extra friction that will keep the weft in place even if it's cut.
This is apparently common in industrial weaving, with big bobbins at the back on a special device that rotates them.
Obviously, we don't have that, so we need to create this twisting with shafts that only move up and down, like in the old days.
The schematic below shows our goal: note the mirrored twists that will make us use two versions of the setup.

This is where doupes come in.
As the Posselt article above details, doupes are special heddles that pull a thread around another.
A full gauze setup would have doupes on every other thread,
plus a tensioner to compensate the extra take-up caused by the twisting.
Luckily, we only want extra edge threads that can keep our weft in place:
we can just put those threads on bobbins dangling at the back of the loom, as shown below.

I made my doupes with texsolv heddles, which is the first thing I would fix next time.
That caused way too much friction and made the weaving difficult, in addition to damaging the heddles beyond repair.
My first sample used a single "skeleton" half-shaft, with a single heddle, the doupe, looped around the thread:
the doupe only hangs from one side of the shaft, which is why it's called "skeleton".
Note that this half-shaft therefore needs extra, regular heddles on the side to keep the bars attached to each other!
The production weave used a dual-shaft setup as described in the Posselt article, with a skeleton half-shaft,
and a standard shaft with regular heddles.
The doupes go through the eye of the regular heddle, then back up through the top.
That kept the doupe in place a bit better, but might only be really necessary on a jack loom.
The doupes can be "top" or "bottom", that means attached to either the top or the bottom of a shaft.
With top doupes, pictured below, they'll be tightened i.e. activated by lifting the shaft.
With bottom doupes, they'll be activated by dropping the shaft.
You can just flip the schematic upside-down for how that would look.
With the two-shaft setup, the lifting or dropping is relative to the standard shaft:
the skeleton shaft stays still, while the standard shaft goes up (for bottom doupes) or down (for top doupes).

In the setup I used, the douped thread always goes up, so the weft can pass under it.
It will move between the left and right side of its companion thread, but always be above it.
In one position, the doupe activates, pulling the douped thread around its companion, then up.
In the other position, the doupe stays loose, and the douped thread is lifted by a normal shaft.
The extra threads are therefore threaded on regular shafts all the way at the back:
the douped thread on a shaft that always goes up,
the companion on a shaft that always goes down.
The doupe shafts are then setup all the way at the front.
If the doupe thread is initially to the right of its companion,
the doupe needs to be placed on the left of the threads, and is a left-hand doupe.
If the doupe thread is initially to the left of its companion,
the doupe needs to be placed on the right of the threads, and is a right-hand doupe.
Between the regular shafts and the doupe shafts,
the companion thread is passed above and to the other side of the doupe thread,
creating a twist that will be pushed to the front and locked by the weft,
then be compensated by an opposite twist as the warp goes back to its resting position.
This of course means that the douped thread needs to be sleyed in the same dent as its companion,
otherwise the reed will prevent the twist from traveling forward to the open shed.
In the schematics below, the left side shows a front view of the heddles, while the right side shows a top view of the warp.
The red thread represents the weft being passed on a given pick.
The treadles tie-up got a bit complicated.
The countermarch means I don't need perfect balance in the setup,
but if a shaft is either idle or going in a single direction all the time it's still going to need balancing.
That's how I ended up tying up extra treadles I didn't use, just to keep things in equilibrium.
- The douped threads are on a shaft all the way at the back which always goes up.
That shaft is therefore tied with long strings to extra treadles which would make it go down, but are unusued.
- The companion threads are on a shaft all the way at the back which always does down.
That shaft is therefored tied with short strings to the same extra treadles, which would make it go up.
- The skeleton shaft will either be staying idle or going in a single direction, which means it neeeds to be balanced in the same way.
- The extra standard shaft, if used, will always be going in a single direction,
be it down (with top doupes) or up (with bottom doupes), and has to balanced as well.
On the Swedish-countermarch draft below, the base weave is a 2-2 balanced twill.
I added two shafts at the back: P1 for the companion threads, P2 for the douped threads,
and balanced them with the extra B treadles.
I then added two shafts at the front: S1 is the skeleton with the doupe loops, S2 is the standard shaft.
This was using the two-shaft setup with bottom doupes.
Black squares are long strings that pull shafts down, white squares are short strings that pull shafts up,
crosses are untied.
NB: This is reconstructed from memory as my notes were faulty, I had to iterate while in the loom,
and obviously forgot to take new, correct notes.
I will update this next time I set a warp up if I find a mistake.
I setup the warp as normal, with four extra threads on each side and spacing between the parts.
This is because I didn't want one shuttle selvedge and one cut selvedge on a scarf,
so I needed extra waste fabric on the side to catch the shuttle turns.
This had the immense advantage of not having to care one bit about how neat the selvedges were:
they'd be cut away.
I left two centimeters between the two scarves, which was a bit more than needed.
The weaving went well overall but was definitely a bit touchy.
My extra edge threads were spun silk while my main warp was grabby Swedish wool, causing snags at time.
As mentioned, the texsolv doupes caused too much friction, which caused more snags here and there.
That meant that the twist sometimes didn't form properly, and I had to fix 30 or so of them after cutting down.
That fixing was time-consuming enough to negate most of the savings from the technique,
since I had to examine the cloth thread by thread with a magnifier,
carefully cut the weft when I noticed a missed twist,
and manually re-twist the extra threads and pass the weft inside it.
I twisted the fringes directly on the loom as per this video series.
With the wool being somewhat grabby, it means that I only had to weave extra tabs at the start and end,
then could just cut down and toss the whole thing into the bathtub for fulling.
The downside of the in-loom twisting is that one side would be lovely and well-formed,
while the other would be a bit loose.
That's due to the twisting direction interacting with the yarn's own ply twist.
For finishing, I used warm water and agitated a fair bit, making sure to work the edges so the extra threads would meld with the weft.
I could then cut between the various parts, striving to keep them even.
The result was definitely worth the effort.
I was able to weave two scarves at once, without having to think about selvedges while weaving.
The resulting cut edges are fluffy and lovely.
I'll definitely try it again, but with smoother, homemade heddles for the doupes, smoother edges threads,
and skipping the skeleton shaft as I suspect it's not necessary on a countermarch.
I'm less convinced about in-loom fringe twisting, since having one side turn out loose is not quite acceptable,
at least with this type of yarn.


